InWebo application declaration
The information listed here is provided as an example only. This methodology is not supported by Identity Analytics, but has been tested.
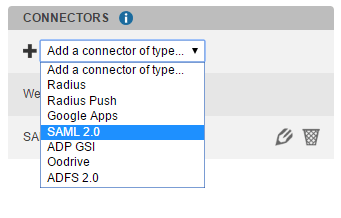
Connect to the inwebo administration console https://www.myinwebo.com/console/admin and create a new SAML 2.0 connector.

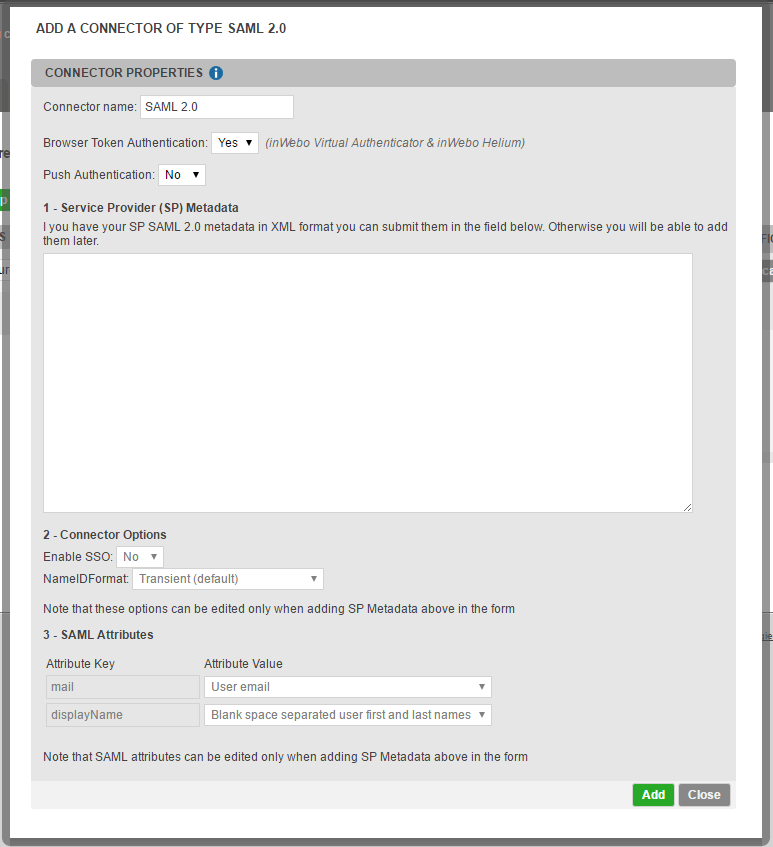
Configure your SAML 2.0 connector. The easiest way is to prepare a sp-metadata.xml file (see below for more details on this) and to copy/paste its content in the Service Provider (SP) Metadata section.

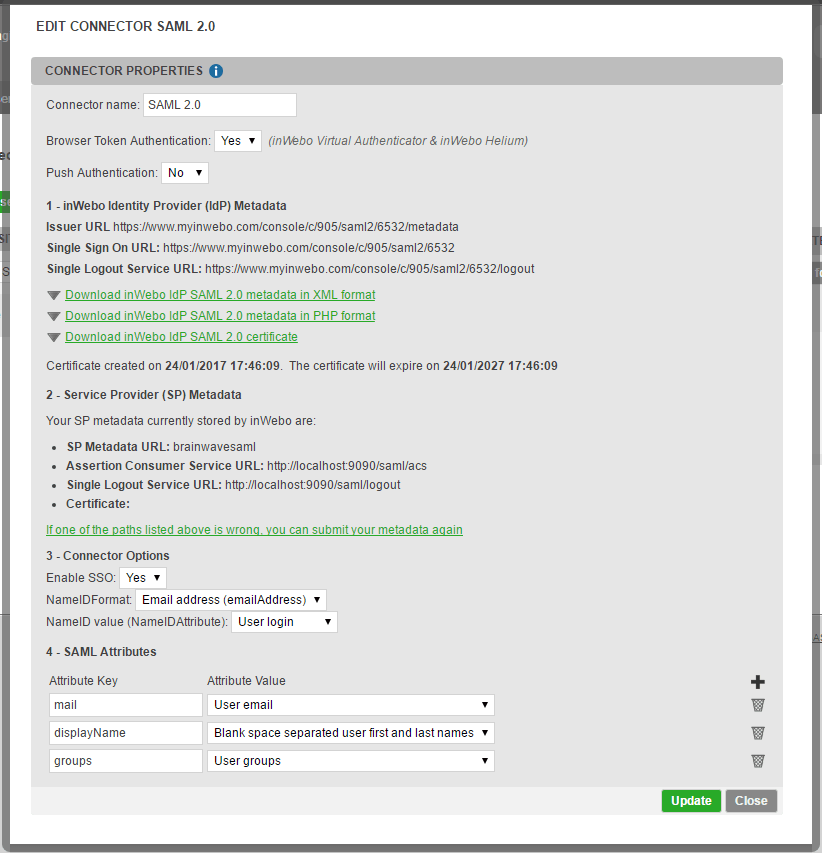
Once this is done, download the inWebo SAML 2.0 metadata file in XML format by clicking on the hyperlink, you will have to declare this file in the Identity Analytics SAML connector at a later stage.
Update the NameID format and change it from Transient to Email address (emailAddress).
If you want to propagate roles to the web application, configured as groups in inWebo, add a SAML attribute:
groups as a name and User groups as a value.

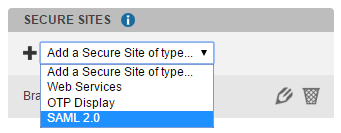
Declare a new application, select SAML 2.0 type.

Configure your application name and the main portal URL.
Select either give access to all users or give access to only defined groups of users depending on your security settings (start by give access to all users for test purposes).

Once the configuration is done, and depending on the give access settings, your inWebo users will now be able to access the Identity Analytics portal.