Actions and Events
Built-in Actions
General principles
Some widgets allows you to attach a series of action. Those actions are executed when an event occurs, for instance :
- A click on a button
- A click on a link
- A click on a tab
- ...
When a Widget accept an action, an 'actions' property is present. You can click on Ctrl+Space to have a broad view of all the actions available.
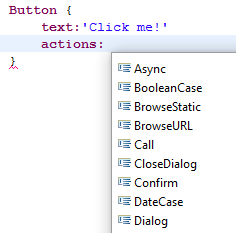
Through actions you can:
- Display flash info's
- Display message box
- Display custom dialog box
- Manipulate variables
- Jump to another location (Pages, Report, …)
- Update workflow instances status
- ...
Here is a simple example:
Button {
  text:'Click me!'
  actions:Message "Hello world"
}
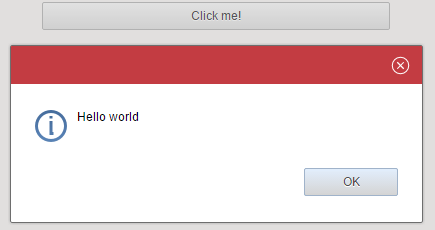
You can also execute a series of action, in order to do so you just have to use the ',' character as a separator:
Button {
  text:'Click me!'
  actions:Message "Hello world",
  Flash "You clicked on a button",
  GoTo HomePage
}
Now that we know that we can catch an event, lets see what actions are available.
Like in many cases, Ctrl+space is recommended to discover the options:
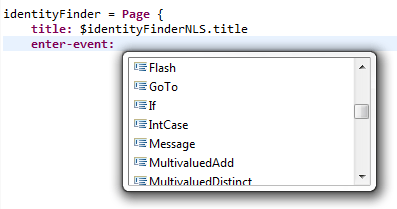
Here is a list of the most common actions.
Displaying a message dialog box
Pre-built dialog boxes are provided out of the shelf, through those dialog boxes you can display some information.
The 'Message' keyword is used to display information dialog box. Here is a simple example:
Message "Hello world"
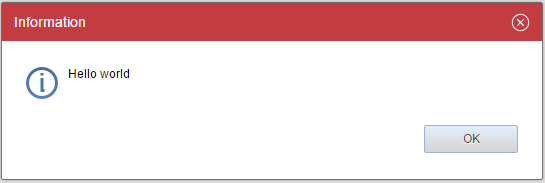
You can also add an icon to your dialog box (Warning, Error, Information),
if nothing is specified, the Information icon is used.
Message Information "Hello world"

Your dialog box can contain several lines of text:
Message Information "Hello world\nthis a long message..."
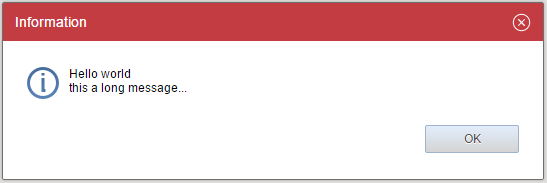
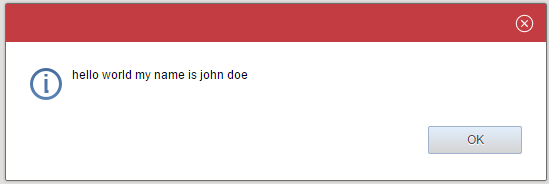
And of course it can also reference dynamic values such as variables, Record fields, nationalized fields,...
all transformation actions are also accepted.
myVariable = Variable{initial:"hello world"}
Message Concat(myVariable, " my name is john doe")
Displaying a confirmation dialog box
Pre-built dialog boxes are provided out of the shelf, through those dialog boxes you can ask for simple confirmation.
The text message format is similar to the information dialog boxes.
The 'Confirm' keyword is used to display dialog box. Here is a simple example:
Confirm "Are you sure?"
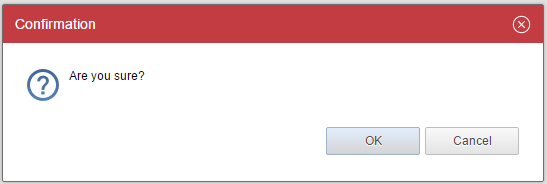
The user can either clic on the OK button of the Cancel button.
If the user doesn't clic on the OK button, the remaining actions won't be executed.
For instance:
Button {
  text:'Click me!'
  actions:Confirm "Are you sure?",
  Flash "Ok, you are sure",
  GoTo HomePage
}
Will display a flash information and will jump the user to the home page only if the OK button is clicked.
Displaying a flash information
You can display asynchronous flash information banners, this is very useful when your actions are technical actions and you want to provide a feedback to the user that those actions have been made.
Here is a simple example:
Flash "Here is a simple flash information message"

You can add a type to your flash information (Warning, Error, Information), it will change its background color.
For instance:
Flash Error "Here is a simple flash information message"
Jumping to another element
Through the GoTo keyword, you can jump to:
- HomePage
- Default concept Pages
- Dedicated Pages
- Portal Reports
- Embedded static HTML content
- Static HTML content as a new pane
- Third party web site as a new pane
- Back in the browsing history
- Batched report
- Dynamically found pages
The syntax is similar to the syntax found under the 'Link' widget.
HomePage
In order to jump to the default home page of the user, you use the HomePage keyword:
GoTo HomePage
Default concept Pages
You can jump to a default concept page through dedicated Activity keyword followed by the target (Account, Application, Asset, Group, Identity, JobTitle, Organisation, Permission, Reconciliation, Repository, Right, TicketLog, Usage) and the action (Detail, List, Search):
GoTo Activity Identity Search
This method is preferred to jumping to specific pages because, as we will see now, you can easily modify/override the target page in a single point.
Those default concept pages can accept parameters with the 'with' keyword. For instance
GoTo Activity Identity Detail with myVariable to identityUid
The target page is declared through a dedicated syntax in the Page language. All Identity Analytics concepts have default activity pages associated to them, you will find those declaration under the activities.page in each concept subdirectory (for instance webportal/pages/account/activities.page)
Activity {
  concept: Identity
  kind: Detail
  to: Page identityDetailsPage
}
You can easily override them thanks to the priority property:
Activity {
  concept: Identity
  kind: Detail
  to: Page myidentityDetailsPage
  priority:3
}
You can also attach a discriminator to an activity, if the discriminator is found the user will be redirected to the page, if the discriminator is not found the user will be rolled back to the default activity page.
Activity {
  concept: Account
  kind: Detail
  to: Page myADDetailsPage
  discriminator:ActiveDirectory
}
You can use the discriminator by adding it while specifying the activity, for instance:
GoTo Activity Account(ActiveDirectory) Detail with myVariable to identityUid
You can attach a feature to an activity, this is interesting when used jointly with the priority keyword and several activities are defined for a same target+action. The Pages engine will dynamically choose the page depending on the current user roles.
Activity {
  concept: Identity
  kind: Detail
  to: Page myidentitySecurityDetailsPage
  priority:3
  feature:securityAnalyst
}
Specific Pages
You can jump to a specific page of the project through the Page keyword and the corresponding page id.
for instance:
GoTo Page defaultHomepage
where defaultHomepage is the id of the page where you want to redirect the user to.
If the target page is not declared within the same file, it has to be included through an include statement.
for instance:
import"/webportal/pages/account/search.page"
...
GoTo Page accountSearchPage
You can send parameters to your target page thanks to the 'with' keyword. If you need to send several parameters, you have to separate them with a ','.
for instance:
GoTo Page myAnalyticsPage with 'static value' to parameter1, myVariable to parameter2
Please not that autocompletion is available to help you fulfilling the page id.

Portal Reports
You can jump to a dedicated portal report through the Report keyword and the corresponding report id.
GoTo Report analysis_accountenabledusergone
The report has to be declared through a 'Report' object. For instance:
analysis_accountenabledusergone = Report {
  report: "/reports/analysis/accountenabledusergone.rptdesign"
  feature: analysis_accountenabledusergone
  title: $report.analysis_accountenabledusergone.title
  tags: "generic", "control"
  icon: "16/audit/account_16.png"
}
All default reports are already declared a page. In order to use them you just have to import the following page into your page:
import "/webportal/pages/reports/standard.page"
Reports can accept parameters in the same way as pages:
GoTo Report analysis_organisationreview_crosstab with myVariable to applicationrecorduid
please note that autocompletion is available to help you finding the report id

Embedded static HTML content
You can jump to static HTML content thanks to the 'Static' keyword.
A static location has to be declared in the technical configuration (static.directories property).
The path is relative to the static location.
for instance:
GoTo Static "tutorial.htm"
Static HTML content as a new pane
You can open a new pane with static content with the BrowseStatic keyword.
A static location has to be declared in the technical configuration (static.directories property).
The path is relative to the static location.
for instance:
BrowseStatic "tutorial.htm"
Third party web site as a new pane
You can open a new pane with static content with the BrowseURL keyword.
for instance:
BrowseURL "http://www.brainwave.fr"
Back in the browsing history
You can browse back in the pages history with the BackInHistory and BackInHistoryTruncate keywords.
If you use BackInHistoryTruncate the user won't be able to browse back and forth.
for instance:
GoTo BackInHistoryTruncate
Batched report
If you leveraged the batched reports feature, you can jump to those pre-built reports with the Position keyword.
This is used jointly with a BatchedReports Dataset.
for instance:
batched1 = Dataset {
  batched-reports: BatchedReports
}

Table {
  data: batched1
  double-click: StringCase(Current status) { when "C" then [ GoTo Position Current position] }

  Column {column:status}
  Column {column:submissionDate}
  Column {column:completionDate}
  Column {column:title}
}
Additional keywords have been added to the Report declaration in order to declare batched reports:
batched-only: (boolean): is the report a batched reportbatch-start-event: (list of actions): actions to execute when accessing to a batched report that has not yet been scheduledbatch-pending-event: (list of actions): actions to execute when accessing to a batched report that has been scheduled but not yet completed
A dedicated Dataset type has been added to help you querying batched reports, for instance:
batchedReports = Dataset {
  batched-reports: BatchedReports {
    status: Submitted, Running
    submission-date: after Date.offset(-5 days)
  }
}
The BatchedReports block accept those properties:
with-anonymous: (a boolean predicate): also contains anonymous reports along with reported scheduled by the current user,status: (a list of execution status): batching statues are Completed, Submitted, Running and Error. A status can be preceded by the Not keyword in order to invert the selection,submission-date: (a date interval): only contains reports submitted after or before a date or between two dates,completion-date: (a date interval): only contains reports completed after or before a date or between two dates.
Pages found dynamically through tags
If you leveraged the 'Tag' feature with the pages, you can browse through the pages with Datasets.
If you want to jump a such a page, you need to use a dedicated keyword: Dynamic.
A dynamic page link must contains both the type of the link (report or page) and the id of the report/page.
for instance:
identityanalytics = Dataset {
  pages: Pages{tags: "identity" and "byuid" }
}

Table {
  data: identityanalytics
  double-click: GoTo Dynamic (Current type, Current name) with identity.uid to uid

  Column {column:title}
}
Option to save page state when following GoTo link
Goto Pages statement allows navigating to another page, for example to display the details of a selected item, or to switch to a related task.
However, when getting back to the original page using the browser's back button or the breadcrumbs links, the page state is lost, that is, all editable or selectable widgets are reset to their original state or value. This is detrimental to the user's experience.
save-state option automatically saves the state of a page before following a Goto link and can be used in any type of Goto statement.
GoTo save-state Activity Identity Detail with selectedIdentity to paramIdentityUid
When going back to the original page using the browser's back button or the breadcrumb links, its state is fully recovered:
- widget selections ( table selection, tab folder selection, combo, check boxes, radio buttons ,etc...)
- editable widgets content ( text fields etc.)
- widget content ( tables, crosstabs, charts ,etc..)
- custom widgets
- internal variables, parameters, datasets, records and tasks are restored
- periodic actions are restored if active
The following limitations apply when restoring a page:
Enter-event&post-render-eventactions are not re-executed, as they are supposed to be executed only once.- No data queries are issued to the server when restoring the page, which means it's displayed instantly, but with exactly the same content as before. If some dynamic information has changed in the meantime (eg. reconciliation info, review status), the user will have to manually refresh the page.
- To preserve server memory usage, saved states are limited to 3 pages per user, including the current page. This is enough in most cases. Older pages will be reset to their initial state when backed to.
- Clicking on a menu item, hitting F5 or clicking the yellow refresh button resets the current page (forcing reloading of data) and clears any previously saved pages.
This behavior can be turned off globally on the server ( regardless of Goto save-state statements) by setting the following environment variable:
-Dpage_save_state_disabled=true
Modifying variables
You can set/modify/filter variable values within actions
Set a mono valued variable value
myvariable = Variable{multivalued:False}
...
Set 'this is a value' to myvariable
Set a multi valued variable value
reset a multi valued variable to make it empty
Set [] to myVariable
Initialize a multi valued variable with some static values
Set [10,20,30] to myVariable
Initialize a multi valued variable with the same value repeated 1000 times
Set ['X' repeat 1000] to myVariable
Reset a variable to its initial value
myvariable = Variable{multivalued:False, initial:'first value'}
...
Unset myvariable
All changes made to the variable since the page initial display will be discarded, the variable value will be rolled back to its initial value (the one specified in the Variable declaration, or empty if no initial value have been specified).
Insert or append values to a multi valued variable
You can append a value to a multi valued variable
MultivaluedAdd "value" to myVariable
You can explicitly define if you want to append or insert the values through dedicated top and bottom keywords.
MultivaluedAdd "Const" to myVariable at bottom
MultivaluedAdd "Const" to myVariable at top
Remove elements from a multi valued variable
MultivaluedRemove "value" from myVariable
remove the first occurrence of "value" in the multi valued variable myvariable
MultivaluedRemove all "value" from myVariable
remove all occurrence of "value" in the multi valued variable myvariable
Deduplicate elements from a multi valued variable
MultivaluedDistinct myVariable
Replace elements from a multi valued variable
MultivaluedSet "val2" to myVariable where myVariable is "val1"
Replace the first occurrence of val1 to val2 in myVariable
MultivaluedSet "val2" to myVariable where all myVariable is "val1"
Replace all occurrences of val1 to val2 in myVariable
MultivaluedSet "val2" to myVariable where all myVariable is "val1"
Replace all occurrences of val1 to val2 in myVariable
MultivaluedSet "val2" to myVariable where all myVariable in ["old1", "old2", "old3"]
Replace all occurrences of old1,old2 or old3 to val2 in myVariable
Pick a value at a given index in a multi valued variable
ElementAt 3 of V1
picks the 3rd element in the V1 multi valued variable.
The index starts at 1.
Initialize a multi-valued variable with values from the identity ledger
You can use the TransferData keyword to execute a view (through a dataset) and retrieve all data from a view column in a multi-valued attribute.
identities = Dataset {
  view:br_identity
}

...

TransferData identities(fullname) to (myVariable)
Count the number of items with a specific value in a multi valued variable
Actually, you can't do this directly, but you can perform a count through a filtered dataset, here is an example:
var = Variable {
  multivalued:True
  initial:['ok','ok','ok','ok','ok','ok','ok','tobereviewed','ok','ok','tobereviewed','ok','ko','ok','ko','ok','ok','ok','ok','tobereviewed','ok']
}

tobereviewedCounter = Dataset {
  columns:var
  includes: StringPredicate (Current var) { when "tobereviewed" then True}
}

...

Text {
  label:'Number of items left to review'
  value:Count tobereviewedCounter
}
This counts the number of items equals to 'tobereviewed' in the var variable.
It leverages a column dataset with a filter and use it with a Count.
Iterate over multi-valued variable values
You can iterate over all values of a multi valued variable and execute a series of action for each discrete value, this is similar to a 'for each' statement in some other languages.
In order to do so, you have to use the MultivaluedIterate syntax.
Here is a simple example:
var_elems = Variable{multivalued:True initial:[10,351,654,11,258]}
var_sum = Variable{multivalued:False}
...
Set 0 to var_sum,
MultivaluedIterate var_elems as elem [
  Set Sum(var_sum, Current elem) to var_sum
]
It iterates over all values of var_elems and sum all the values in var_sum.
Note that the variable as been renamed inside the iteration, the current value is 'elem', you can manipulate it with the following syntax 'Current elem'.
If you want to execute several actions under the iteration, you need to separate them with a ',' character.
As another example, if prm_path contains the path to a file, for example "/a/b/c/d.txt", the action:
MultivaluedIterate Split prm_path using "/" as part index-as idx [
  IntCase(Current idx) {
    when = 1 then []
    otherwise [
      IntCase(Difference(SizeOf Split prm_path using "/", Current idx)) {
        when > 0 then [
          StringCase(var_directory) {
            when IsEmpty then [ Set Current part to var_directory ]
            otherwise [ Set Concat(var_directory, "/", Current part) to var_directory ]
          }
        ]
      }
    ]
  }
]
Will set the parent directory of the file to the variable var_directory ("a/b/c" in the example).
Managing multi-valued variables as a single array
You can consider a series of multi valued variables as a single indexed set.
It is more or less equivalent to a Table.
It is very useful when you bind those variables in a dataset displayed in a table with rich GUI updates.
It is also very useful when you are dealing with a series of workflow variable that you need to consider as a single array.
Set/Update a variable value depending on another variable value
This syntax is very similar to an SQL update syntax.
Imagine a situation where you have 2 multivalued variables :
V1 = [ok,ok,ko,ok]
V2 = [johnid,davidid,synthiaid,carolid]
You manage those variable as a single array :
V1 | V2 |
|---|---|
ok | johnid |
ok | davidid |
ko | synthiaid |
ok | carolid |
You want to update carole status but setting its V1 value to 'ko', thus you want to change V1 value only when V2 value at the same index equals to 'carolid'.
You can do this with this syntax:
MultivaluedSet 'ko' to V1 where V2 is 'carolid'
This will replace only the first occurrence, if you want to replace all V1 occurrences you need to write the following:
MultivaluedSet 'ko' to V1 where all V2 is 'carolid'
You can test this on you own :
V1 = Variable {multivalued:True initial:['ok','ok','ko','ok']}
V2 = Variable {multivalued:True initial:['johnid','davidid','synthiaid','carolid']}

tableData = Dataset {
  columns:V1,V2
}


Button {
  text:'replace carole status'
  actions:MultivaluedSet 'ko' to V1 where all V2 is 'carolid'
}

Table {
  sata:tableData
  Column{column:V1}
  Column{column:V2}
}
Note that you can also update several variables at once by using the following syntax:
MultivaluedSet ('ko', 'my new value') to (V1, V3) where all V2 is 'carolid'
V1 | V2 | V3 |
|---|---|---|
ok | johnid | |
ok | davidid | |
ko | synthiaid | |
ok | carolid |
becomes:
V1 | V2 | V3 |
|---|---|---|
ok | johnid | |
ok | davidid | |
ko | synthiaid | |
ko | carolid | my new value |
Deduplicate a variable considering that multiple variables are indexed
Let's take the same example:
V1 = [ok,ok,ko,ok]
V2 = [johnid,davidid,synthiaid,carolid]
You manage those variable as a single array :
V1 | V2 |
|---|---|
ok | johnid |
ok | davidid |
ko | synthiaid |
ko | synthiaid |
ok | carolid |
You want to remove duplicated V2 values, thus in this example you want to remove the second synthiaid occurrence. But you also want to remove the corresponding value at the same index on the V1 variable (you want to delete a line in the array).
You can do this with the following syntax:
MultivaluedDistinct V2 and (V1)
If you have more than 2 variables, the syntax is the following:
V1 | V2 | V3 |
|---|---|---|
ok | johnid | paris |
ok | davidid | paris |
ko | synthiaid | london |
ko | synthiaid | montreal |
ok | carolid | new york |
MultivaluedDistinct V2 and (V1,V3)
Remove entries in a variable considering that multiple variables are indexed
Let's take this example:
V1 | V2 | V3 |
|---|---|---|
ok | johnid | paris |
ok | davidid | paris |
ko | synthiaid | london |
ko | synthiaid | montreal |
ok | carolid | new york |
You want to remove the first occurrence of synthiaid in V2. You want to delete the full line, thus you also want to delete the corresponding values in V1 and V3 at the same index.
You can do this with the following syntax:
MultivaluedRemove 'synthiaid' from V2 and (V1,V3)
This will remove the first occurrence, if you want to remove all occurrence you write:
MultivaluedRemove all 'synthiaid' from V2 and (V1,V3)
Initialize several variables from an Identity Ledger view
You can do this with the TransferData keyword.
For instance, if you want to initialize 3 multi-valued variable vhrcode, vfullname and vmail with data from the "br_identity" view, you write:
identities = Dataset {
  view:br_identity
}
...
TransferData identities(hrcode,fullname,mail) to (vhrcode, vfullname, vmail)
Iterate over an array of multi-valued variables
Let's take this example:
V1 | V2 | V3 |
|---|---|---|
ok | johnid | paris |
ok | davidid | paris |
ko | synthiaid | london |
ko | synthiaid | montreal |
ok | carolid | new york |
You can iterate over a variable with MultivaluedIterate (see upper)
Here is the syntax if you want to access each current value within the loop:
MultivaluedIterate V1 as mastercolumn index-as idx [
  Message Concat(Current mastercolumn, " ",  ElementAt idx of V2, " ", ElementAt idx of V3)
]
We are using 'index-as' to retreive the current index of the iteration.
We are leveraging this information with the 'ElementAt' syntax in order to retrieve the corresponding value in all other multivalued variables.
Reloading a dataset content
Most of the time, dataset are reloaded automatically. This is for instance the case when their parameters change.
But you can also sometime be in a situation where you need to force a dataset reloading. This is the case when you have asynchronous processes who update the Identity Ledger data.
This is done through workflow activities to:
- reconcile accounts
- update management information
- update metadata...
If you launched a workflow as part of your actions and you are expecting some changes in the underlying dataset, you can force a refresh by using the ReloadData keyword.
for instance:
ReloadData mydataset
Note that it's working for any kind of dataset.
Displaying a custom dialog box
Dialog box General principles
You can display a custom dialog box with the 'Dialog' keyword followed by the dialog id.
Here is a simple example:
myDialog = Dialog {
  title:'My dialog box'
  width:640
  height:200
  buttons:[OkButton CancelButton]

  Text {compact:True value:'My custom message...'}
}

...

Button {
  text:'Click me'
  actions: Dialog myDialog
}
Marshalling parameters
You can marshall variables between your page variables and the dialog variables with the from/to syntax.
Here is an example:
myDialog = Dialog {
  title:'My dialog box'
  width:640
  height:480
  buttons:[OkButton {actions:Set '1' to outVariable} CancelButton]

  inVariable = Variable
  outVariable = Variable

  Text {compact:True value:Concat('My custom message:',inVariable)}
}

...

result = Variable

Button {
  text:'Click me'
  actions: Dialog myDialog('Error detected' to inVariable, result from outVariable)
}
Note that Dialog do not accept parameters, they use variables instead. The from/to keywords help you to pass information to your dialog box and to retreive information from your dialog box.
Dealing with ok/cancel buttons
If the user click on 'Cancel' on a dialog box, the other actions won't be executed.
If you want to add more action buttons on your dialog box, you must use the close and status properties within the ActionButton to define if the dialog exits with an 'ok' action or a 'cancel' action (therefore continuing or not the actions on the caller).
myDialog = Dialog {
  title:'My dialog box'
  width:640
  height:480
  buttons:[
    OkButton {actions:Set '1' to outVariable}
    CancelButton
    ActionButton {
      text:'complementary action'
      actions:Message 'hello'
      close:True
      status:Ok
    }
  ]

  inVariable = Variable
  outVariable = Variable

  Text {compact:True value:Concat('My custom message:',inVariable)}
}

...

Button {
  text:'Click me'
  actions: Dialog myDialog('Error detected' to inVariable, result from outVariable), Message 'I am displayed only if you clicked on OK or complementary action'
}
Closing a dialog box next to an action
You can use the CloseDialog action in order to close a dialog box next to any action:
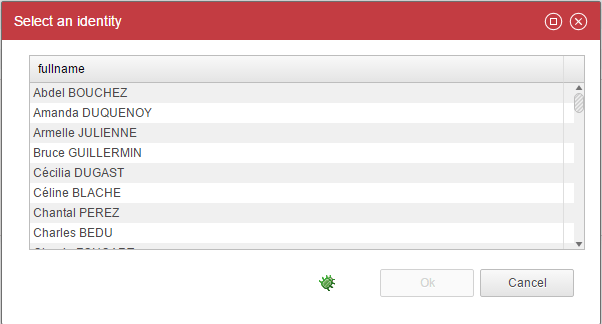
identityPickerDialogBox = Dialog {
  title:'Select an identity'
  width:600
  height:400
  buttons:[
    OkButton{disabled:StringPredicate(selectedIdentity) {when IsEmpty then True}}
    CancelButton
  ]

  selectedIdentity = Variable

  identities = Dataset {
    view:br_identity
  }

  Table {
    data:identities
    layout:Layout{grab:horizontal True vertical True}
    double-click:CloseDialog Ok

    Column {column:uid hidden:True selection:selectedIdentity}
    Column {column:fullname width:100%}
  }
}
The CloseDialog action is followed by Ok or Cancel keyword.
If you want to close a dialog box with an Ok event, the Ok button must be declared as well.
Displaying a transient dialog box
You can display a minimal dialog box (without title bar, border and buttons).
This is useful if you want for instance display charts or html content as dialog boxes.
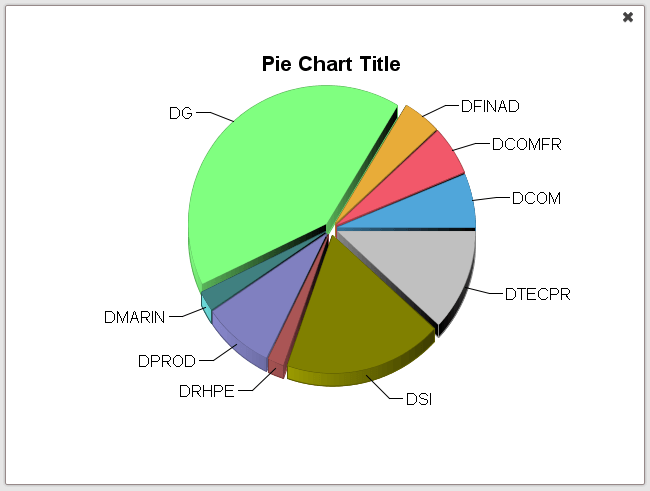
Transient dialog box are modal, upon dialog box closing the remaining actions will be executed.
Here is an example:
myPieInfo = Dialog {
  title:'My pie info'
  width:640
  height:480

  mydata = Dataset {
    view:orgdata
  }

  Chart {
    file:'charts/pie'
    data:mydata
    series:(Current code) as String in "category", (Current nbidentity) as Integer in "value"
    layout:Layout{grab:horizontal True vertical True}
  }
}

...

Button {
  text:'Show infos'
  actions:TransientDialog myPieInfo
}
Dealing with workflow instances
You can interact with workflows through actions:
- create a new workflow instance
- update a manual task status
- manage instances (pause, kill, ...)
You manipulate your workflow instance through a dedicated Record: the TaskRecord.
Through this Record, you are able to read and write workflow variables and to create/update /manage your workflow instance.
Create a new workflow instance
In order to create a new workflow instance, you first have to declare it using the corresponding TaskRecord directive with a create keyword.
On the action, you then just have to call the TaskComplete order.
Here is a simple example:
task = TaskRecord(create "myworkflowid")

...

Button {
  text:'Click me'
  actions: TaskComplete task
}
"myworkflowid" corresponds to the id of the workflow as defined in your configuration:
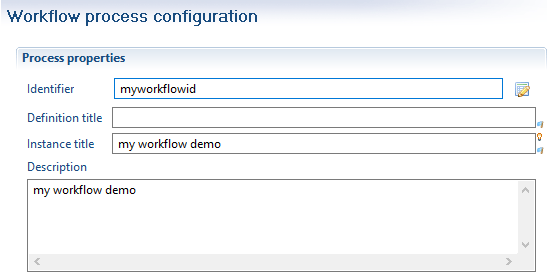
Note that the workflow instance won't be created until the TaskComplete action is called.
You can marshall workflow variables thanks to the TaskRecord object, note that those variables are both read and write:
Text {
  compact:True
  value:task.workflowData
}

Button {
  text:'Click me'
  actions:
  Set result to task.workflowVar,
  TaskComplete task
}

When calling the TaskComplete action, the workflow is launched asynchronously, this means that actions continues although the workflow instance has not been completely launched.
If you want to wait till the task is completed this you should use the following syntax :
Button {
  text:'Click me'
  actions: TaskComplete task wait-end
}
Complete a manual task
Dealing with a manual task can only be done in pages called from the workflow engine.
Those pages accept the current workflow task id as a parameter, this parameter is used in turn to initialize the TaskRecord object.
Here is an example:
taskId = Parameter {
  type: String
  mandatory: True
}

task = TaskRecord(taskId)
In order to complete a manual task you use the TaskComplete keyword
Button {
  text:'Click me'
  actions: TaskComplete task
}
You can marshall workflow variables thanks to the TaskRecord object, note that those variables are both read and write:
Text {
  compact:True
  value:task.workflowData
}

Button {
  text:'Click me'
  actions:
  Set result to task.workflowVar,
  TaskComplete task
}

When calling the TaskComplete action, the workflow instance is updated asynchronously, this means that actions continues although the workflow instance has stabilized to a stable state (waiting for a user interaction,timer, finalized, error).
If you want to wait till the task is completed this you should use the following syntax :
Button {
  text:'Click me'
  actions: TaskComplete task wait-end
}
Update a manual task variables without completing it
Dealing with a manual task can only be done in pages called from the workflow engine.
Those pages accept the current workflow task id as a parameter, this parameter is used in turn to initialize the TaskRecord object.
Here is an example:
taskId = Parameter {
  type: String
  mandatory: True
}

task = TaskRecord(taskId)
In order to update a manual task you use the TaskSave keyword
Button {
  text:'Click me'
  actions: Set "updateddata" to task.myWorkflowVariable, TaskSave task
}
The task variables will be saved in the workflow database but the workflow instance will remain in the same state: the manual task will still be associated with the current user.
Release a manual task to all task candidates
Dealing with a manual task can only be done in pages called from the workflow engine.
Those pages accept the current workflow task id as a parameter, this parameter is used in turn to initialize the TaskRecord object.
Here is an example:
taskId = Parameter {
  type: String
  mandatory: True
}

task = TaskRecord(taskId)
In order to release a manual task you use the TaskCancel keyword
Button {
  text:'Click me'
  actions: TaskCancel task
}
Once released, the manual task will be available again to all task candidates.
Note that workflow variable updates will be discarded:
Button {
  text:'Click me'
  actions: Set "new value ignored..." to task.myWorkflowVariable, TaskCancel task
}
Thus, in the upper example, task.myWorkflowVariablewill remain with the same original value (the one stored on the workflow database). Workflow variables are only updated with the TaskComplete and TaskSave keywords.
Validate business conditions prior completing a task
You can specify a series of business rules to validate workflow variables upon a manual task completion.
Those business rules are defined directly in the workflow definition:
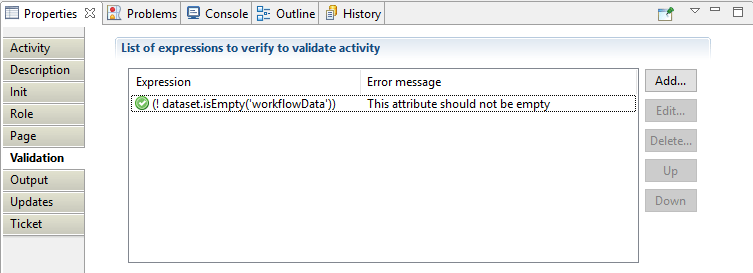
In order to leverage those business rules in your page you have to declare the following pattern on your action:
Button {
  text:'Click me'
  actions:
  StringCase (TaskValidation task) {
    when IsEmpty then [
      Message "no business rule errors",
      TaskComplete task
    ]
    otherwise [
      Message Error TaskValidation task // show the error message
    ]
  }
}
The TaskValidation keyword will execute all the declared business rules. If a rule returns an error, the TaskValidation stop iterating through the business rules and returns the error message.
Reassign a manual task
Dealing with a manual task can only be done in pages called from the workflow engine. Those pages accept the current workflow task id as a parameter, this parameter is used in turn to initialize the TaskRecord object.
Here is an example:
taskId = Parameter {
  type: String
  mandatory: True
}

task = TaskRecord(taskId)
You can force a task resignation with the TaskReassign keyword.
Here is an example:
TaskReassign task-id taskId to identityuid
Where identityuid is the timeless identifier of the identity on which the task is reassigned.
If you want to reassign a task to yourself, you can use:
TaskReassign task-id taskId to Principal.uid
Unassign a manual task
As of version 2017 R2 SP5, it is possible to unassign a task. If a task has been taken or assigned to a user that cannot complete the task (vacations, left the company...), it is now possible to release it, so that another user or delegatee can complete the task.
Here is an example:
taskId = Parameter {
  type: String
  mandatory: True
}

task = TaskRecord(taskId)
You can release the task with the TaskReassign keyword.
Here is an example:
TaskReassign task-id taskId to ''
Add candidates to a manual task
It is now possible to add candidates to a task (2016 R3 SP4 and up).
Here is an example :
taskId = Parameter {
  type: String
  mandatory: True
}

task = TaskRecord(taskId)
You can add candidates to a task with the TaskAddCandidate keyword.
Here is an example :
TaskAddCandidate task-id taskId new-candidate identityuid
Where identityuid is the timeless identifier of the identity who will be added as candidate.
Skip a task in error
You can skip a task in error state with the following keyword TaskErrorContinue followed by the taskid.
For instance: an automated task which communicate with a third party system through JSON/REST or an automated task who send an email.
skipping a task in error can lead to unexpected results as some variables could end up with values that are not 'standard' (for instance some variables could be null as they normally should have been fulfilled in the task in error).
Simple example:
Button {
  text:'Skip the task in error'
  actions: TaskErrorContinue task
}
Full example:
tasks = Dataset {
  tasks:TaskFilter {
    show-error:True
  }
}
Table {
  data:tasks
  double-click:StringCase(Current taskStatus) { when "Error" then [ TaskErrorContinue task ] }

  Column {column:taskStatus}
  Column {column:taskName}
}
Retry a task in error
You can retry to execute a task in error state with the following keyword TaskErrorRestart followed by the taskid.
For instance: an automated task who send an email with the corresponding SMTP server which is down.
Simple example:
Button {
  text:'Retry the task in error'
  actions: TaskErrorRestart task
}
Full example:
tasks = Dataset {
  tasks:TaskFilter {
    show-error:True
  }
}
Table {
  data:tasks
  double-click:StringCase(Current taskStatus) { when "Error" then [ TaskErrorRestart task ] }

  Column {column:taskStatus}
  Column {column:taskName}
}
Stop (kill) a process instance
You can kill a running process instance. It will stop any current task and terminate the process abruptly.
In order to do so, you must have a reference to the process id.
Simple example:
ProcessTerminate process-id selectedProcess
Full example:
processes = Dataset {
    processes:ProcessFilter {
    show-completed:False
  }
}

Table {
  data:processes
  double-click:ProcessTerminate process-id Current processId

  Column {column:processName}
}
Suspend a process instance
You can suspend a running process instance. Available manual tasks will be suspended (not available anymore).
In order to do so, you must have a reference to the process id.
Simple example:
ProcessSuspend process-id selectedProcess
Full example:
processes = Dataset {
  processes:ProcessFilter {
    show-completed:False
    show-suspended:False
  }
}

Table {
  data:processes
  double-click:ProcessSuspend process-id Current processId

  Column {column:processName}
}
Resume a process instance
You can resume a running process instance that has been previously suspended.
In order to do so, you must have a reference to the process id.
Simple example:
ProcessResume process-id selectedProcess
Full example:
processes = Dataset {
  processes:ProcessFilter {
    show-completed:False
    show-suspended:True
    hide-active:True
  }
}

Table {
  data:processes
  double-click:ProcessResume process-id Current processId

  Column {column:processName}
}
Jump to the process information page
You can declare an information page in your process. This page can be displayed when the process is active.
As a best practice, you define within this page some details about the process instance (a read-only version of a review screen, ...) in order for the manager to have an overview of what's going on inside the process instance.

In order to display the information page, you use:
GoTo ProcessInfoPage processId
You can wrap the goto instruction with a condition to enable the action only if a page has been declared in the workflow definition:
Button {
  text:'goto information page'
  actions:GoTo ProcessInfoPage selectedProcess
  disabled:Not BooleanPredicate(ProcessInfo(process-id selectedProcess, InfoPageDefined))
}
If the workflow is in error state, the 'error page' will be displayed instead of the 'information page'.
Jump to the process report page
Once a process instance is finalized, it remains in the workflow database.
You can still show a page related to this workflow instance, in order to do so you have to declare this page in the 'report page' section of the workflow definition.
This is useful if you want to provide management interfaces with summary pages of finalized process instances.

In order to jump to the process report page, you use:
GoTo ProcessReportPage processId
You can wrap the goto instruction with a condition to enable the action only if a page has been declared in the workflow definition:
Button {
  text:'goto report page'
  actions:GoTo ProcessReportPage selectedProcess
  disabled:Not BooleanPredicate(ProcessInfo(process-id selectedProcess, ReportPageDefined))
}
Download a compliance report
You can declare a compliance report in a workflow definition.
This report will be automatically generated upon workflow instance completion. The report will be kept in binary format along with the 'TicketLog' associated with the workflow instance.
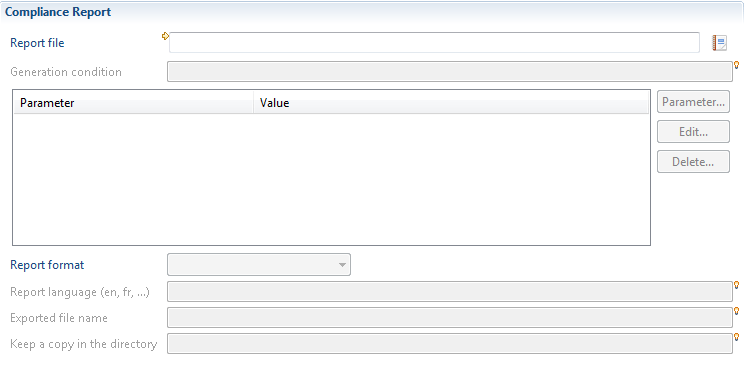
You can download the compliance report thanks to the following syntax:
DownloadComplianceReport ticketLogId
You can wrap this action with a test to enable the action only if a compliance report is present
Button {
  text:'download compliance report'
  actions:DownloadComplianceReport ticketlogid
  disabled:Not HasComplianceReportPredicate(ticketlogid)
}
Exporting a report in a printable format
A user can retrieve a report in a binary format in several ways:
- the report can be sent by email through notification rules, either on a scheduled basis or at a user discretion through the ExecuteNotification keyword
- the report can be shown to the user through a GoTo Report xxx keyword followed by a user interaction to export the report
- the report can be batched and retrieved afterwards through the GoTo Position xxx keyword
- a compliance report can be retrieved with a user interaction as a binary format with the DownloadComplianceReport keyword
- a compliance report can be generated on a folder on the server side
- reports can be generated on a folder on the server side through batched notification rules
- a report can be generated and proposed to download to a user through an action
We will here present the last use case.
In order to export a report in a printable format, you leverage the ExportReport keyword.
Here is a simple example:
Button {
  text: "Export PDF"
  actions: ExportReport "/reports/browsing/identitysearch_simple.rptdesign"
  with "*" to ^hrcode, "*" to ^surname, "*" to ^givenname, "hrcode"
  to ^sort format "pdf"
}
ExportReport takes the report definition as a parameter, it can provide parameters to the report through the 'with' keyword. If several parameters have to be provided, they are separated by a ','.
You define the export format to a given format with the 'format' keyword (pdf, xls, doc, ods, odt).
You can force the name of the file with the export-name keyword. the extension will be added automatically.
Button {
  text: "Export with name"
  actions: ExportReport "/reports/browsing/identitysearch_simple.rptdesign"
  with "*" to ^hrcode, "*" to ^surname, "*" to ^givenname, "hrcode"
  to ^sort format "pdf" export-name "toto"
}
When a report is generated, it is kept in the server cache. Thus, requesting several times the same report won't overload the server and will provide a better user interaction.
It can be interesting to ignore the server cache capabilities and to force a full report generation: if the report deal with data who changed such as reconciliation status for instance.
In order to ignore the cache the use the no-cache command.
Button {
  text: "Export with name"
  actions: ExportReport "/reports/browsing/identitysearch_simple.rptdesign"
  with "*" to ^hrcode, "*" to ^surname, "*" to ^givenname, "hrcode"
  to ^sort format "pdf" export-name "myreportname" no-cache
}
You can be in a situation where you want to generate a report without taking into consideration the current user context, if it is the case you can use the anonymous keyword.
Button {
  text: "Export with name"
  actions: ExportReport "/reports/browsing/identitysearch_simple.rptdesign"
  with "*" to ^hrcode, "*" to ^surname, "*" to ^givenname, "hrcode"
  to ^sort format "pdf" export-name "myreportname" anonymous
}
Send a reminder to unfinished tasks on demand
A new option has been added to allow the action of sending a reminder email to all unfinished tasks of a given process on demand.
To do so simply call ProcessSendReminder sending the process id as a parameter in a the desired page.
For example to create a button to send reminders on demand:
Button {
  actions: Confirm $self_review_managementNLS.confirmsendreminder, ProcessSendReminder reviewprocess, Flash $self_review_managementNLS.remindersent
  text:$self_review_managementNLS.sendreminder
  feature: self_review_cansendreminder
}
In this case reviewprocess is defined as:
reviewprocess = ProcessRecord(processId)
Dealing with delegation
You access to the web portal in delegated mode.
This can be done through the web portal: if a delegation is active, the user just have to click on the upper right corner icon to choose a delegatee.
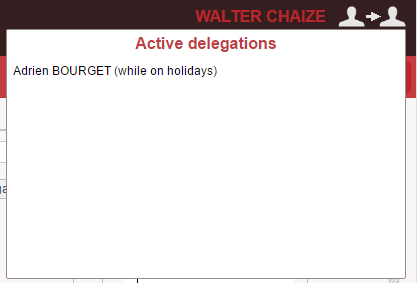
Once clicked, the web portal will appear in delegatee mode (XXX as YYY).

The user just have to click once again on the upper right corner icon to terminate the delegation.
In order to configure a delegation, the user have to declare it, either through the delegation facet sample or through a dedicated page along with its workflow (delegation are managed through workflow activities for audit purposes).
If using the delegation facet sample, the delegation is configured through the user preference (accessible by clicking on the user name on the web portal).

You can be in a situation where you want to force the activation of the delegatee mode on your app. In that case you can use dedicated orders as described below.
Start a delegation
You can start a delegation with the StartDelegation keyword followed by the identity UID of the delegatee.
Here is a simple example:
Button {
  text:'Start delegation'
  actions:StartDelegation delegateeUID
}
The portal will jump to the default home page delegatee.
The delegation will remain active until the end of the session or an explicit end of the delegation.
You can also jump to a dedicated web portal element in delegatee mode.
Here is an example:
Button {
  text:'Start delegation'
  actions:StartDelegation delegateeUID to Page accountSearchPage
}
the syntax next to the 'to' keyword is similar to the GoTo syntax.
Terminate a delegation
You can explicitly terminate a delegation on a user session with the TerminateDelegation keyword.
Here is an example:
Button {
  text:'Terminate delegation'
  actions:TerminateDelegation
}
Once again, you can also jump to a dedicated web portal element while closing the delegatee mode.
Button {
  text:'Terminate delegation'
  actions:TerminateDelegation to Page accountSearchPage
}
Grabbing the current delegation status
You can test if the user is in delegatee mode with a special feature: DelegationActive.
Here is an example:
Button {
  text:'Terminate delegation'
  actions:TerminateDelegation
  disabled:Not FeaturePredicate DelegationActive
}
Calling a service
You can declare java or javascript services in pages. Those services can embbed dedicated algorithm to deal with data or interact with third party systems.
Declaring a service is out of the scope of this section, we will ony give here a simple example of a service declaration:
srv_reconciliation_owner = EventService {
  reference: reconciliation
  selection: setOwner
  accountRecordUid = Input
  identityUid = Input
  comment = Input
  result = Output
}
You can call this service in an action with the following syntax:
Call srv_reconciliation_owner
If the service accept parameters, you can marshall them with the following syntax:
Call srv_reconciliation_owner(myVariable to accountRecordUid, myvariableresult from result)
To corresponds to input variables in the service declaration from corresponds to output variables in the service declaration.
Executing a notification rule
You can execute an existing notification rule.
This will execute the notification rule and send the corresponding emails.
Example:
ExecuteNotifyRule mynotification
where mynotification is the notification rule identifier
Note: You cannot pass any parameter to the notification rule, if you want to build a dynamic notification you should wrap this notification rule into a workflow instead.
Executing actions asynchronously
You can execute your actions asynchronously with the Async keyword.
It means that the user won't be stuck, even if the actions take a long time to execute.
There are limitations on asynchrous execution, the most important one is that all interaction with the user through GUIs is disabled if actions are executed asynchronously.
It includes, but not limited, to Flash, MessageBox, ExportReport, ... the GUI listeners are also disabled, which means that if you modify variable who have impacts on the GUI such as updating content the content won't be updated.
As a result, this is limited to technical operations such as call a javascript service which can take time.
Here is an example:
Button {
  text: "Reconcile users as a background task"
  actions: Async [
    Call srv_reconciliation_owner
  ]
}
Adding conditions in a given action
You can add conditions in a given action. This is useful if you want to execute different actions depending on a condition (a variable value, a test, ...)
If
The If statement is used with boolean variables. It executes a series of action the variable equals to true.
Here is a simple example:
Button {
  text:'click me'
  actions:If myVariable1 [Message 'hello', GoTo HomePage], Flash 'Clicked'
}
It displays the message box and jump back to the default home page only if myVariable1 equals to true, in any case it shows a flash information.
You can test several boolean variables at once, in that case all variables must equals to true.
Here is an example:
Button {
  text:'click me'
  actions:If myVariable1,myVariable2 [Message 'hello', GoTo HomePage], Flash 'Clicked'
}
It displays the message box and jump back to the default home page only if both myVariable1 and myVariable2 are equals to true, in any case it shows a flash information.
Unless
The Unless statement is used with boolean variables. It executes a series of action the variable equals to False.
Here is a simple example:
Button {
  text:'click me'
  actions:If myVariable1,myVariable2 [Message 'hello', GoTo HomePage], Flash 'Clicked'
}
It displays the message box and jump back to the default home page only if myVariable1 equals to False, in any case it shows a flash information.
You can test several boolean variables at once, in that case at least one variable must equals to false.
Here is an example:
Button {
  text:'click me'
  actions:If myVariable1,myVariable2 [Message 'hello', GoTo HomePage], Flash 'Clicked'
}
It displays the message box and jump back to the default home page if either myVariable1 or myVariable2 equals to false. in any case it shows a flash information.
StringCase
You can execute various actions depending on a string value. This string can be provided as an expression, a variable, a record/current dataset element or a static value.
The pattern is similar to the switch/case/default pattern.
Here is an example:
Button {
  text:'click me'
  actions:
    StringCase (myVariable1) {
      when "string1" then [
        Message 'myvariable1 equals string1',
        Flash 'done'
      ]
      when "string2" then [
        Message 'myvariable1 equals string2',
        Flash 'done'
      ]
      otherwise [
        Message Concat('myvariable1 equals another value:',myVariable1),
        Flash 'done'
      ]
    },
    GoTo HomePage
}
IntCase
You can execute various actions depending on a int value. This int can be provided as an expression, a variable, a record/current dataset element or a static value.
The pattern is similar to the switch/case/default pattern.
Here is an example:
Button {
  text:'click me'
  actions:
    IntCase (myVariable1) {
    when !=0 then [
      Message 'myvariable1 not equals 0',
      Flash 'done'
    ]
    when =0 then [
      Message 'myvariable1 equals 0',
      Flash 'done'
    ]
    when Not InvalidInteger then [
      Message 'myvariable1 is a valid number',
      Flash 'done'
    ]
    otherwise [
      Message Concat('myvariable1 is an invalid number',myVariable1),
      Flash 'done'
    ]
  },
  GoTo HomePage
}
BooleanCase
You can execute various actions depending on a boolean value. This int can be provided as an expression, a variable, a record/current dataset element or a static value.
The pattern is similar to the switch/case/default pattern.
Here is an example:
Button {
  text:'click me'
  actions:
    BooleanCase (myVariable1) {
    when True then [
      Message 'myvariable1 not equals true',
      Flash 'done'
    ]
    when False then [
      Message 'myvariable1 equals false',
      Flash 'done'
    ]
  },
  GoTo HomePage
}
DateCase
You can execute various actions depending on a date value. This int can be provided as an expression, a variable, a record/current dataset element or a static value.
The pattern is similar to the switch/case/default pattern.
Here is an example:
Button {
  text:'click me'
  actions:
  DateCase (myVariable1) {
    when DateAfter current then [
      Message 'myvariable1 date is after now',
      Flash 'done'
    ]
    when DateBetween current.offset(-5 days) current.offset(5 days) then [
      Message 'myvariable1 date is roughly today',
      Flash 'done'
    ]
    otherwise [
      Message 'myvariable1 date is another date',
      Flash 'done'
    ]
  },
  GoTo HomePage
}
Complex conditions using javascript
You can do complex condition using javascript.
In order to do so, you have to declare your condition in a javascript function and to publish it as a Boolean service.
Once done, using the boolean service is done through a simple BooleanCase.
Here is an example of a BooleanCase used with a BooleanService:
Button {
  text:'click me'
  actions:
  BooleanCase (@myComplexCondition("hello" to val2, myVariable1 to val1) ) {
    when True then [
      Message 'javascript test returns true',
      Flash 'done'
    ]
    when False then [
      Message 'javascript test returns false',
      Flash 'done'
    ]
  },
  GoTo HomePage
}
Here is the corresponding BooleanService declaration:
myComplexCondition = BooleanService {
  javascript-file:"/webportal/pages/home/demo.javascript"
  javascript-method:complexCondition

  val1 = Input
  val2 = Input
}
and the demo.javascript content:
function complexCondition() {
  var val1 = dataset.val1.get();
  var val2 = dataset.val2.get();

  if(val1.equals(val2))
    return true;
  else
    return false;
}
Commands
You can attach commands to most widgets.
Those commands appear as a contextual toolbar.
When you click on a command button, you can execute a series of action.
for instance:

Is defined as:
Edit {
  variable: myVariable
  commands:[
    Command {
      actions:Message 'hello 1'
      icon:'16/audit/identity_16.png'
    }
    Command {
      actions:Message 'hello 1'
      icon:'16/audit/account_16.png'
    }
  ]
}
Each command object has an 'actions' property to declare the corresponding actions. Each command can be disabled or can have a feature attached.
You can layout the command toolbar with the Commands object.
The command toolbar can be horizontal or vertical, it can be put before,after,above or below the widget.
The commands can be displayed as text, icons or links.
Edit {
  variable: myVariable1
  commands: Commands {
    orientation:Horizontal
    position:After
    presentation:Icon
    Command {
      actions:Message 'hello 1'
      icon:'16/audit/identity_16.png'
    }
    Command {
      actions:Message 'hello 1'
      icon:'16/audit/account_16.png'
    }
  }
}
The widgets who accept commands are:
- Header
- Text
- Link
- OpenURL
- Image
- Table
- Tree
- TemplateTable
- Checkbox
- Combo
- RadioButtons
- Edit
- DateTime
- Scale
- Spinner
- MultiEdit
- Upload
- FileUpload
- Chart
- Browser
Named Actions
A set of actions can be given a name using the NamedAction block. These actions can be executed at a latter time using the ExecuteNamedAction action.
For example:
named_actions = Page {
  title: "Named actions"

  var1 = Variable {
    type: Integer
    initial: 0
    }

  act1 = NamedAction(Set Sum(var1, 1) to var1)
  act2 = NamedAction(Flash Information Concat("Var 1: ", var1))
  act3 = NamedAction(Confirm "Are you sure?", ExecuteNamedAction act1, ExecuteNamedAction act2)

  Text {
    value: var1
    label: "Var 1"
  }
  ButtonGroup {
    uniform: True
    align: Center

    Button {
      actions: ExecuteNamedAction act1
      text: "Inc var1"
    }
    Button {
      actions: ExecuteNamedAction act3, Message Information "Done!"
      text: "Exec"
    }
  }
}
named actions do not marshall variables, thus, if needed, you have to deal with named actions parameters through variables directly declared at tha page level.
Events
Some widgets support the handling of Events. Events are usually generated as a consequence of user interaction.
For instance, selection widgets generally support the event selection-changed-event. The Page object supports also some events like the enter-event or exit-event.
When a user selects an item on a table, the selection-changed-event will be fired. When the user leaves a page the exit-event will be fired. The web portal keeps track of those events.
Objects support catching these events by providing an attribute for each one. These attributes can accept Actions.
Like this, when the event is produced, the widget will catch the event and will execute the set of actions that were defined.
For example this page:
examplePage = Page {
  title: $examplePage.title
  enter-event: Set "Hello World" to varMsg

  varMsg = Variable{type:String}
}
This page will catch the enter-event event and will execute the listed actions. In this case, it will set a variable.
The provided actions can be a list of actions sepparated by ',' and they will be executed in order. We will refer to this set of one or many actions as an action block.
You will find below a list of all available events

Page post render event
Page enter-event does not allow to execute interactive actions because it's triggered before the page is rendered.
In order to execute interactive actions that are executed after a page is rendered or a dialog box is opened, you must use the post-render-event: attribute.
post-render-event: can be defined on both pages and dialog boxes and can also be declared inside fragments for reusability.
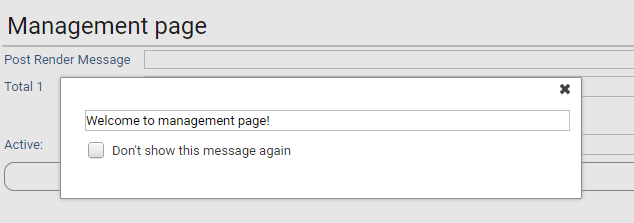
The following example displays a welcome message when a page is displayed, with an option to skip the message the next time
user_DontShowWelcome = UserVariable {
   type: Boolean
   initial: False
}

welcomeDialog = Dialog {
  title: "Welcome"
  height: 100
  Text {
    value: "Welcome to management page! "
  }
  Checkbox {
    variable: UserVariable user_DontShowWelcome
    text: "Don't show this message again"
  }
}

management_page = Page {
  title: "Management page"
  post-render-event: BooleanCase(UserVariable user_DontShowWelcome) {
      when False then [TransientDialog welcomeDialog]
      when True then []}
   . . .
}
Page periodic actions
You can define a set of actions that are to be executed on a periodic basis while a page or dialog box is displayed.
To define periodic actions in a page or dialog box, use the periodic-actions: attribute and PeriodicAction tag as follows:
Page {
  periodic-actions: <PeriodicAction> [ ,<PeriodicAction> ] *
}

<PeriodicAction> = PeriodicAction {
  period: <int>
  [ name: <string> ]
  [ disabled: <BooleanPredicate>]
  actions: <Action1> [, <Action> ]
}
Attribute | Mandatory | Type | Usage |
|---|---|---|---|
| mandatory | positive integer | defines the period, in seconds, for the execution of actions |
| optional | string | optional label for the periodic actions tag, mainly useful for debugging |
| optional | boolean expression | allows to programatically control the execution of periodic actions. The periodic actions only execute when the expression evaluates to False and will be suspended as long as the expression is True. |
| mandatory | list of actions | defines the period, in seconds for |
The example below displays a checkbox that when checked, starts a 15 seconds countdown (3x5) then moves to another page. (this also stops the count down)
periodic_test = Page {
  title: "Test"
  periodic-actions: PeriodicAction {
    period: 3
    disabled: Eval "!count1Active.get()"
    actions:
    Set Sum ( 1, periodCounter) to periodCounter, IntCase(periodCounter) {
      when > 5 then [ GoTo Page  some_other_page]
      otherwise [ ]
    }
  }

  count1Active = Variable { type: Boolean initial: False}
  periodCounter = Variable { type: Integer initial: 0}

  Checkbox {
    text: "Enable periodic actions"
    variable: count1Active
  }

  Text {
    label: "Counter 1"
    value:  periodCounter
  }
}
Notes
- Periodic actions can be defined in either
PageorDialogtags - Periodic actions can also be defined inside a
PageFragmentfor reusability. They will be active in all pages and dialog boxes that use the fragment. periodic-actions:attribute can include more than one comma-separated PeriodicAction, typically with different periods.- Periodic action (unless specifically disabled) start when the page or dialog is displayed and stop when the page or dialog is exited/closed.
- If the periodic action have a
disabled:expression attribute, they will be active as long as the disabled expression evaluates toFalseand suspended as long as it's evaluated toTrue. - Periodic actions are suspended in a page or dialog box while a sub dialog box is opened. They will be resumed as soon as the sub-dialog box is closed.
- Periodic actions can include interactive actions, typically moving to anothe page via a
Gotostatement. It does not make sense to periodically open a dialog box.