Creation and Configuration of a Project
Create an iGRC Project
In the Audit tab, click the Create a new project link.
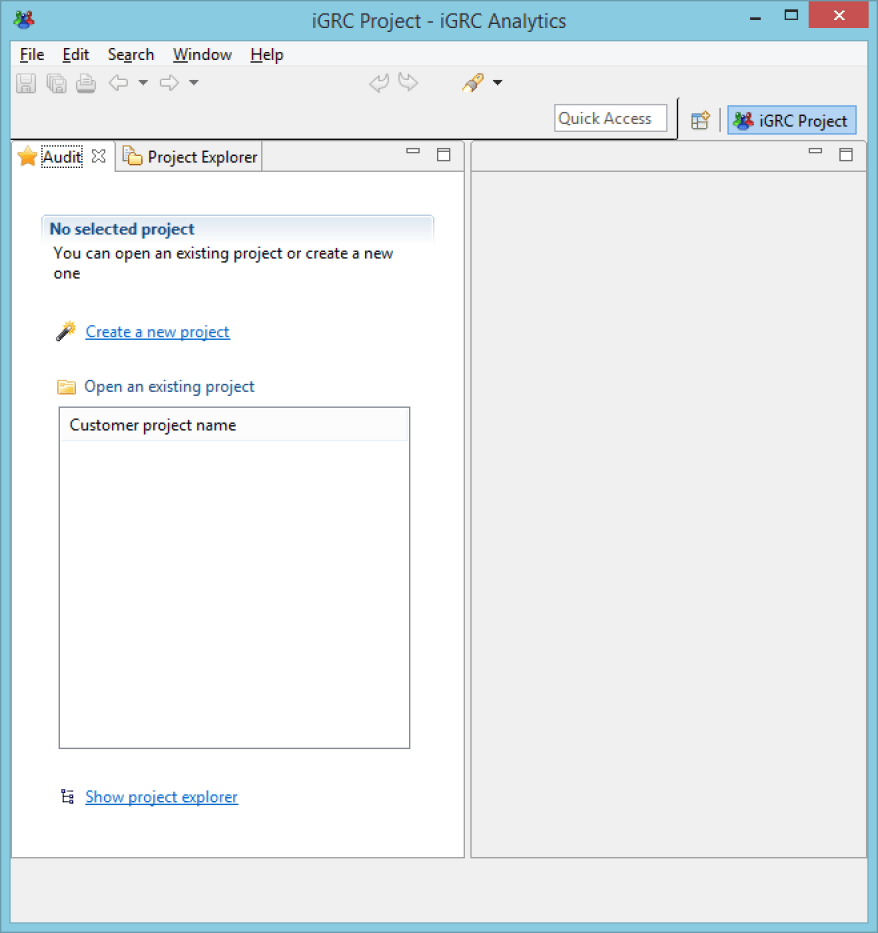
This opens a wizard that allows the user to create a project. It is the just a question of following the steps detailed to create the new project.
In the Project name field, type the technical name of the project (do not use spaces nor special characters):
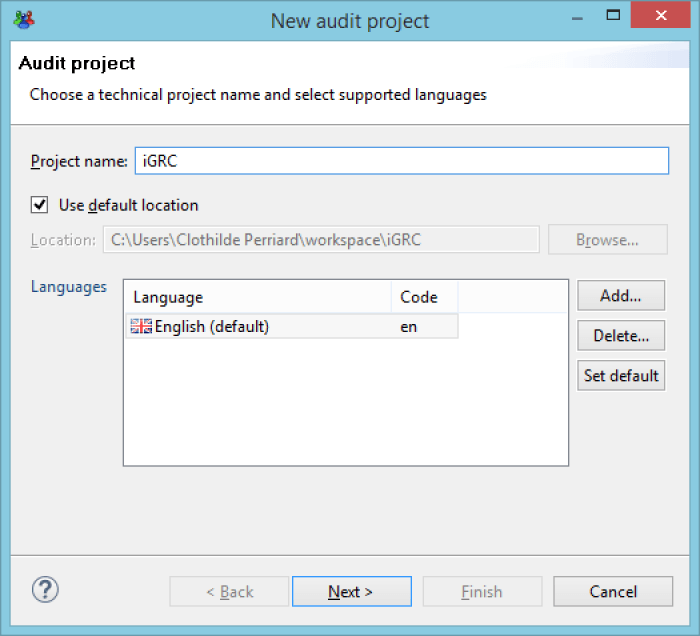
In the Languages section, it is possible to choose the different languages you wish to use in the project as well as change the default language. Click the Next button to continue to the next step of the wizard.
In the Customer project name field, type the project display name and in the Customer name field, type the customer display name. The other fields are optional. Click the Next button to continue to the next step of the wizard.
Fill in the Configuration name (mandatory) and optionally the configuration description:
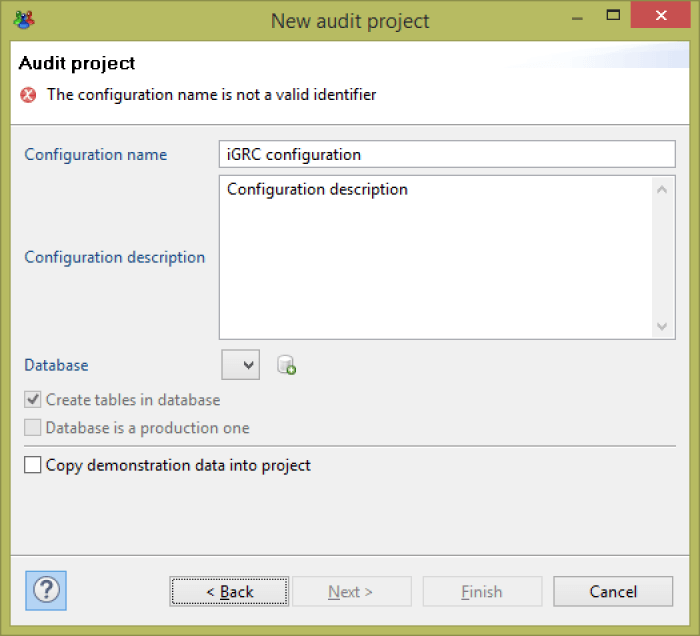
It is necessary to select or create the database connection profile to use in the project. To create the database, proceed as follows:
- Click the
 icon and select the driver type (Oracle, PostGreSQL or SQL Server):
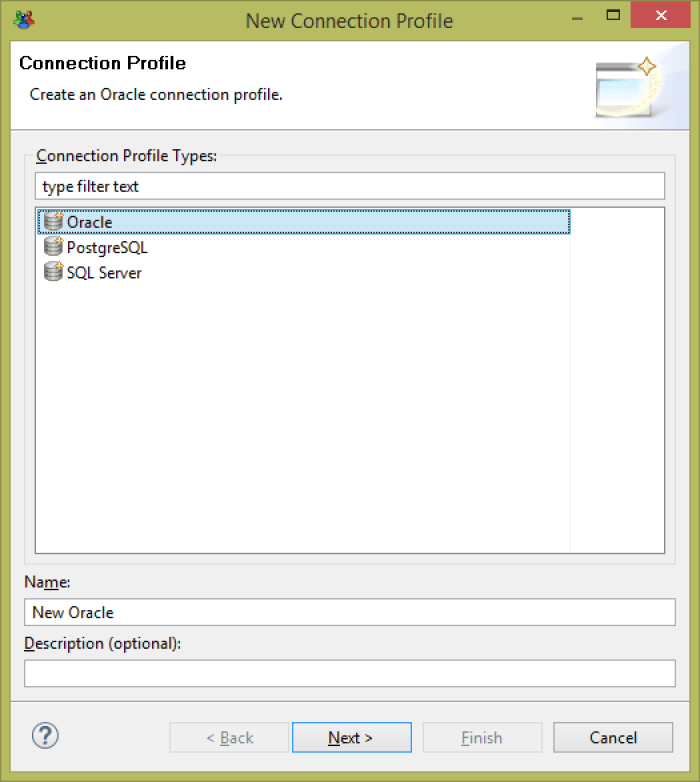 2. Type a name and a description for the connection, then click Next.
3. Enter the information for connection to the base: name of the base, server address and port and name of the base (to be detailed in the connection's URL), connection login and password. The information to provide is based on the database types selected
4. Check the Save password checkbox and click the Test Connection button to check that the details are correct.
5. Click Finish.
If the option Create tables in database is selected then the database schema will automatically be created upon completion of the wizard.
If applicable, select the option the Database is a production one. This option deactivates the initialize the database funcitonnalities in the technical configuration.
Click Finish to complete the creation of the project.
Integration with Version Management Systems
IGRC Analytics offers innate integration with the Subversion, CVS and Git version managers. This integration enables version handling and sharing amongst several users of the iGRC Analytics configuration: collection, rules, reports etc.
It is strongly advised that this functionality be configured in order to benefit from all the functionalities provided by Subversion.
Prerequisites
Subversion integration requires an SVN server, version 1.6 or higher.
Configuration of the Subversion Integration
- Launch the iGRC Analytics Client.
- In the main menu, click Window > Open Perspective > Other¦ and select SVN Repository exploring.
- On the left side of the screen, under the SVN Repositories tab, right click New > Repository Location.
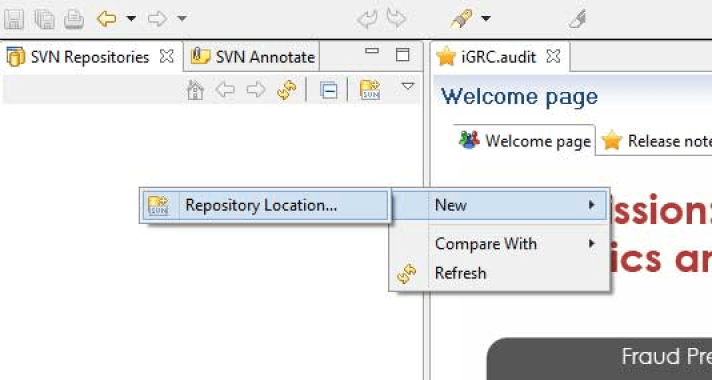 4. In the Url field, type in the URL details for the Subversion server and click Finish.
The Subversion server is registered and the list of projects is displayed.
Depending on the configuration of the Subversion server, you may be required to enter authentication information.
Add an iGRC Project into the Subversion Directory
- On the left side of the screen, in the iGRC Project explorer , right click on the name of the project that you wish to load into Subversion and select Team > Share Project.
- Select the repository type (SVN for Subversion).
- Choose the repository corresponding to the Subversion server.
- Follow the assistant's instructions up to the project loading stage. The loading is done in the task background and takes a few moments.
Depending on the configuration of the Subversion server, you may be required to enter authentication information.
Load an Existing Project from the SVN Repository into the iGRC Analytics Client
- Open the SVN Repository Exploring perspective;
- On the left side of the screen, under the SVN Repositories tab, deploy the Subversion server by clicking on the + icon;
- Select the project and right click Checkout.
- Select the Checkout as a project in the workspace option, then click Finish.
The project creation takes a few moments. Depending on the configuration of the Subversion server, you may be required to enter authentication information.
Synchronize your Project
The synchronization operations of a project enable the Subversion repository to be updated from the local project, or vice-versa:
Update the Subversion Repository
- Under the Project Explorer tab, select the project or subdirectory corresponding to the items, updated locally, that you wish to synchronize.
- Right click Team > Commit.
- Enter the description relating to the updated configuration items and click OK to perform the update.
Update the Local Project
- Under the Project Explorer tab, select the project or subdirectory that you wish to update from the Subversion server.
- Right click Team > Update to HEAD.
The update will start immediately.