Review wizard generation
The idea of the review wizard is to provide an interface to specify review business details and let the product generate the workflow and the user interface. The generated review can be run out of the box. But further customizations can be applied if needed, thanks to the high customization capacity of the Identity Analytics product.
The next paragraphs explain the whole process from the design of the review to the launch of this review:
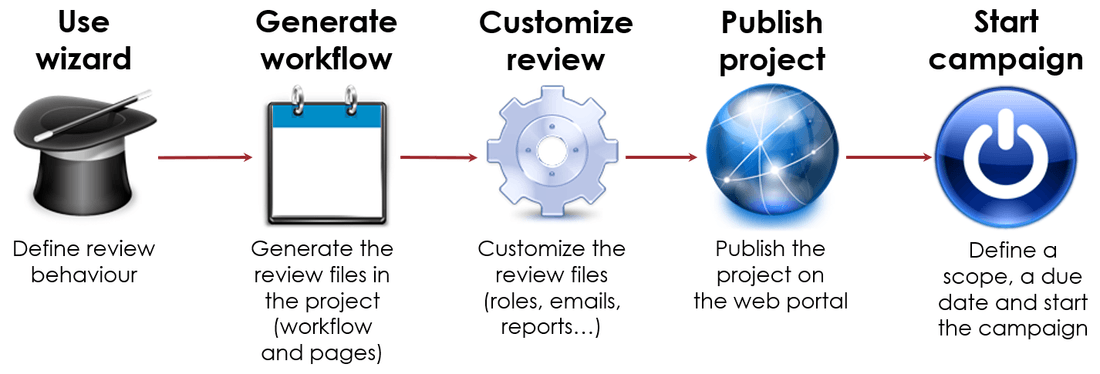
Step 1: A wizard is available in the product if all the prerequisites are matched (see next chapter). This wizard lets you define the review behavior. For example, you will be able to choose the information displayed in the scope selection page and in the reviewer page. You can also define reminders, escalations, detail tabs, ticket mapping...
Step 2: When all parameters are filled, then the workflow files are generated.
Step 3: This is the time to customize what has been generated. For example, you can change the content or the look and feel of all emails. You can change the reports and also the way the reviewers are determined to match your organization.
Step 4: The project can be published as usual on the Web server.
Step 5: In the campaign manager, the campaign can be launched. In the start page, you give a name to the review, a due date and you define a scope and then launch the review.
Let's examine this process in details.
Wizard
Prerequisites
Before starting the wizard, you must ensure that all add-ons needed to run the whole process are installed.
The wizard uses an add-on called bw_reviewtemplates.
This add-on is not packaged in the product but can be downloaded in the marketplace.
This way, new features or bug fixes can happen very often without waiting for the next product release to be delivered.
This add-on needs the following ones:
bw_campaignmanagerbw_htmlwidgetsbw_timelinebw_timelinewidgetbw_task_managerbw_commonsbw_fragmentsbw_texteditorfamfamfam
It is recommended to get the latest version of each add-on.
Kinds of review
When all add-ons have been installed, you can start the review wizard by selecting the following item in the New... menu:
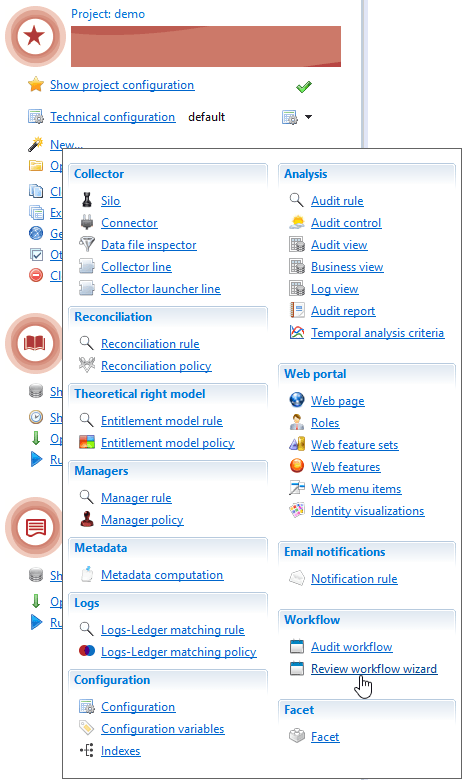
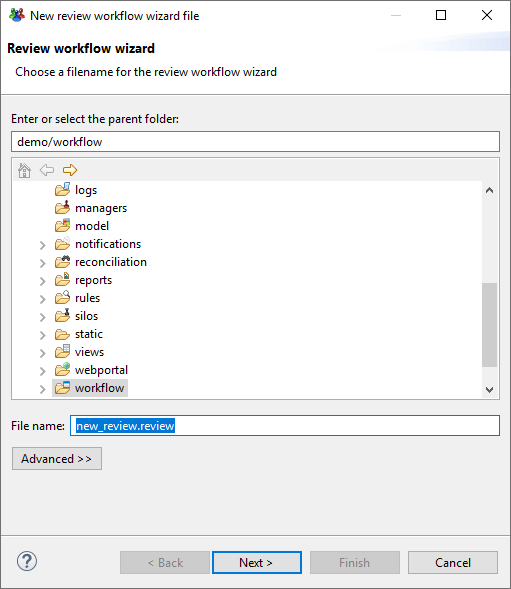
This menu opens a dialog box asking you for a .review file which will be created when the dialog box is validated.
The .review file must be located in the 'workflow' folder.
The .review file is used to store all the designer's choices for the review.
The next panel asks for a review identifier:
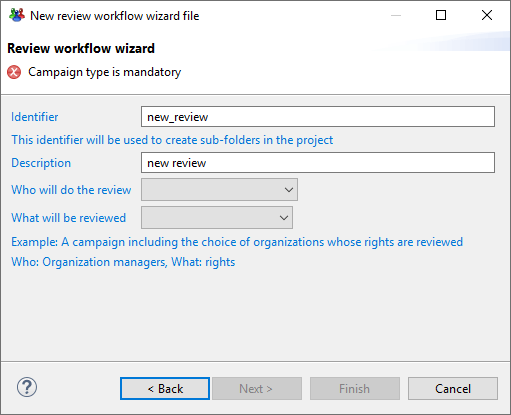
The review identifier is very important. It will be used as a process identifier so it must be unique in the project. Be careful to avoid typos in the identifier because it can not be changed later. This identifier is also used to create sub-folders in many project folders (under views, rules, workflow...).
Who and What
The form contains 2 fields named:
- Who will do the review.
- What will be reviewed.
The field What will be reviewed lets you select what kind of item is reviewed.
Usually the reviews are about rights or sometimes accounts.
The field Who will do the review lets you select how the managers are identified.
This selection has an impact on the way the items will be dispatched to reviewers.
For example, choosing Application managers will group all items by application and select the application manager as the reviewer.
Let's take an example: For a compliance goal, we want to review all rights by the business managers. They have the knowledge about the use of the permissions in their organization. To create such a campaign, we select these options:
- Who will do the review: Organization managers
- What will be reviewed: Rights
To find the organization manager, the review starts with reading all the rights selected in the scope. Then for each right, the review finds the identity owning this right. From the identity, the review finds which organization the identity is working in. The organization manager is selected as the reviewer.

Another example: For a risk based review, we want to review all high privileged accounts regardless the application they belong to. The reviewers will be the repository owners. To create such a campaign, we select these options:
- Who will do the review: Repository managers
- What will be reviewed: Accounts

How to choose Who and What
The choice for Who and What seems obvious at the first glance but it can be tricky. Let's consider the following example: We want to review accounts by application managers. To create such a campaign, we select these options:
- Who will do the review: Application managers
- What will be reviewed: Accounts
It may be OK but there is a risk that it does not match the IT application architecture.
Let's consider that we have 3 applications (Elyxo, Sage and LinFront).
All of them are using Active Directory as their authentication and authorization source (using AD groups like ElyxoUsers, SageUsers and LinFrontUsers).
In Active Directory we find the account CN=Paul Martin,CN=Users,DC=acme which belongs to 3 groups (ElyxoUsers, SageUsers and LinFrontUsers).
How does the review dispatch the accounts to the reviewers ? Paul Martin's account has access to the 3 applications through the groups. So his account will appear in the 3 reviews:
- In the review for Elyxo manager because the account belongs to the ElyxoUsers group.
- In the review for Sage manager because the account belongs to the SageUsers group.
- In the review for LinFront manager because the account belongs to the LinFrontUsers group.
There are 2 possible interpretations:
- We want the account to be reviewed only once. But in this case, how can the review choose an application manager among the 3 application managers ?
- We want the account to be reviewed 3 times. This is because it has access to the 3 applications. But in this case, how to handle contradictory statuses for the same account ?
If we want application managers to determine if the accounts have access to their respective application, then we can challenge the answer Accounts to the question What will be reviewed.
The application manager does not answer the question 'Is this account valid'. He is answering the question 'Is it OK for this account to access the application'.
So the target (what we want to review) is not the account but the access between the account and the application. The good answer to the question What will be reviewed is probably Rights.
This becomes a fined grain review but the user interface may help the manager to accept or revoke all the rights for a given account in one click.
If the goal is to know if the account should be disabled then the application managers are not concerned.
The account belongs to a repository and the repository manager is concerned by this decision.
It means that we probably made an error when answering Application managers to the question Who will do the review.
We should have selected Repository managers. The repository manager can always ask for help if he does not have enough information to decide.
It is important to understand what the wizard generates by default: The kind of reviewed item (Accounts, Rights,...) selected in the wizard dialog is used to attach a decision and is also used to display the item. The cardinality is the same for both. In the previous example, if we have an Account review by Application managers, the displayed item will be an account and the decision will be attached to the account. We can see that this is not what we want because the decision concerns the link between the account and the application not the account itself.
Usually, when the customer says that he wants an Account review by Application managers, he wants a review where the application manager sees a list of accounts accessing his application but the decision should not be attached to the account but to the link Account-Application. The review wizard does not distinguish between the Ledger entity which is displayed and the Ledger entity which is used to attach the decision. But with a little customization, this can be achieved by changing how the review tickets are written in the database so the accounts are displayed but the decisions are attached to rights. This could be seen as the best of both worlds: coarse grain display and fined grain decision: easy and intuitive interface for the application manager and effective rights to revoke for the remediation team.
Unsupported combinations
Depending on the bw_reviewtemplates add-on version, some combinations of Who and What are not supported.
Some of them have no meaning. Some of them are never used.
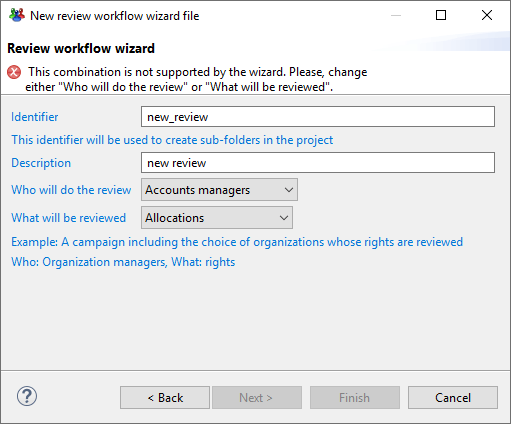
The wizard dialog displays an error if you choose an unsupported combination. This is illustrated in the following screenshot:
Templates
The main add-on for the review wizard is bw_reviewtemplates. This add-on contains all the project files needed for generating the review in the project (.view, .rule, .workflow, .page, .notifyrule, .rptdesign...).
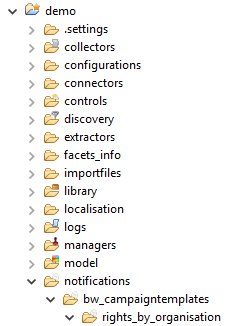
When the wizard dialog box is validated, the product creates folders in your project. In all project folders impacted by the review (pages, workflow, views, rules, notifications...), a sub-folder named 'bw_campaigntemplates' is created. All review files generated by the wizard will be created in this subfolder. Then, inside bw_campaigntemplates, another folder is created using the review identifier.
The following screenshot shows the 2 sub-folders in notifications folder but this is the same in views folder, rules folder...:
The second operation performed by the wizard when the dialog box is validated is to copy files into these newly created folders. The files come from the bw_reviewtemplates add-on. They are called templates (hence the add-on name) because, while they are copied in the project sub-folders, they are patched to put the review name inside.
If you create 2 reviews using the wizard dialog, a view (for example campaign_entities.view) will be copied twice in the project but in different sub-folders. To avoid duplicates view identifier in the project, the view is patched to add the review identifier as the prefix.
With a review named rights_by_organisation, the view identifier campaign_entities is renamed to rights_by_organisation_campaign_entities
while being copied into the folder views/bw_campaigntemplates/rights_by_organisation/campaign entities.view.
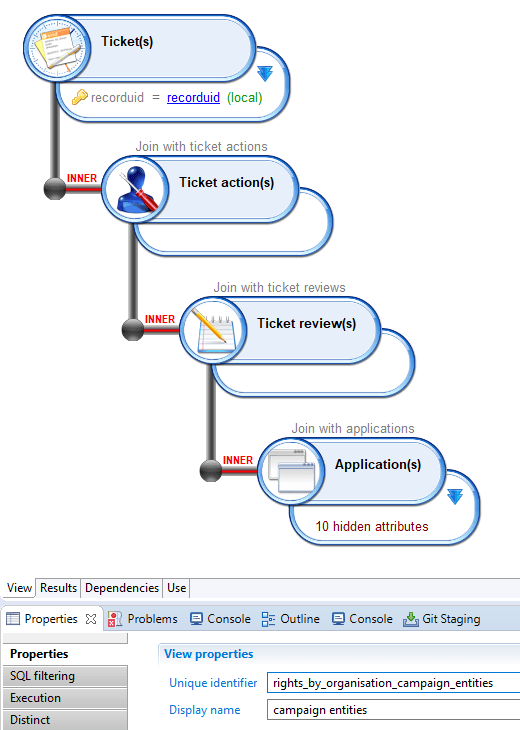
The view filename is not renamed. Only the view identifier is renamed.
At this step, the following file types are copied and patched:
Type | Extension | Description |
|---|---|---|
notifications |
| the mail content sent by the review |
rules |
| the manager resolution |
views |
| the queries used to build GUI for the review and the compliance report |
reports |
| the compliance reports |
Once these files are copied into your project sub-folder, they belong to the project and can be customized. The wizard will never overwrite them and will never need to generate them again. It means that these files can be edited as usual (in the view editor for a view) and adapted to match the customer's need.
Build
Once the wizard dialog is closed and the files are copied into the project folders, the editor is opened.
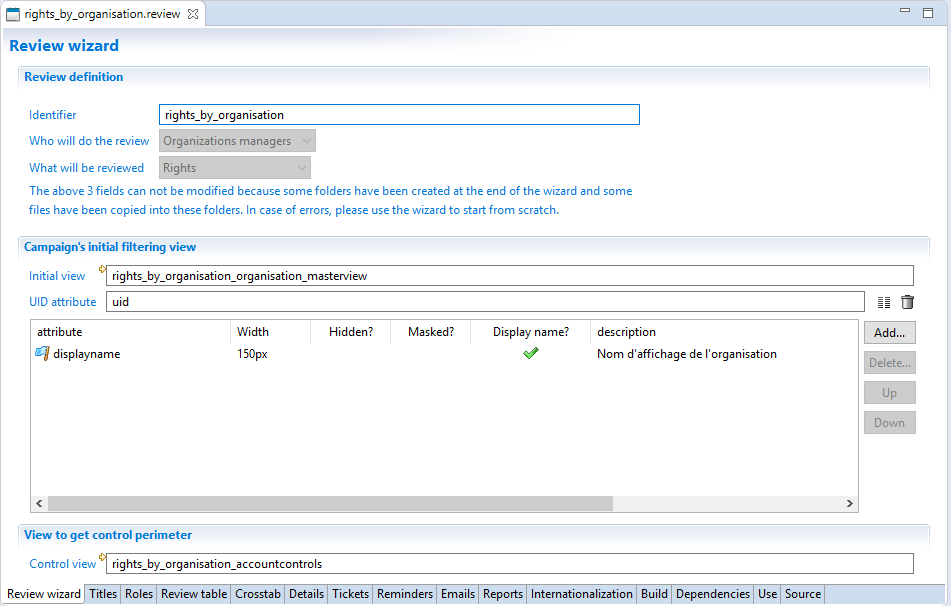
In this editor, you, as the review designer, define the behavior of the review (what is displayed, what are the details tabs, how many reminders, when to escalate...) This editor and all its tabs will be described in details in the next chapter. When you are ready to generate the review from all your settings, you can switch to the Build tab. The following screenshot shows the Build tab:
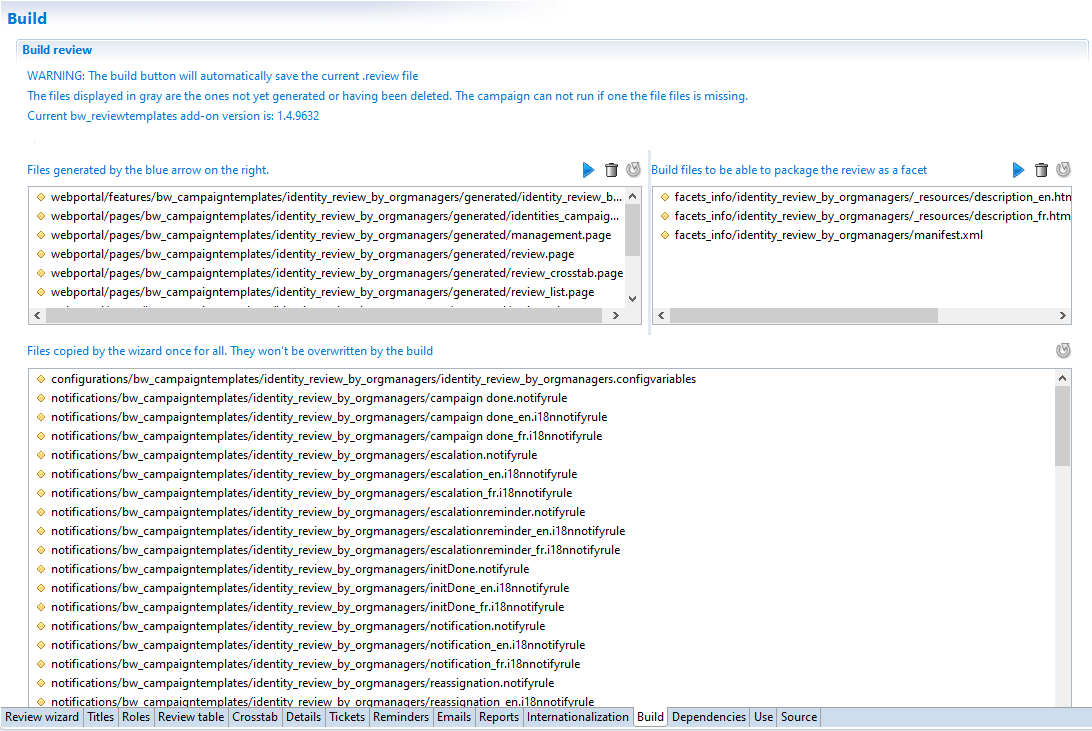
For more details on build review operation please refer to Review build and migration chapter.
Publication and execution
When the review files have been generated, it is time to build the WAR and publish the WAR on the Tomcat server.
When the portal is up and running, a new process definition is available.
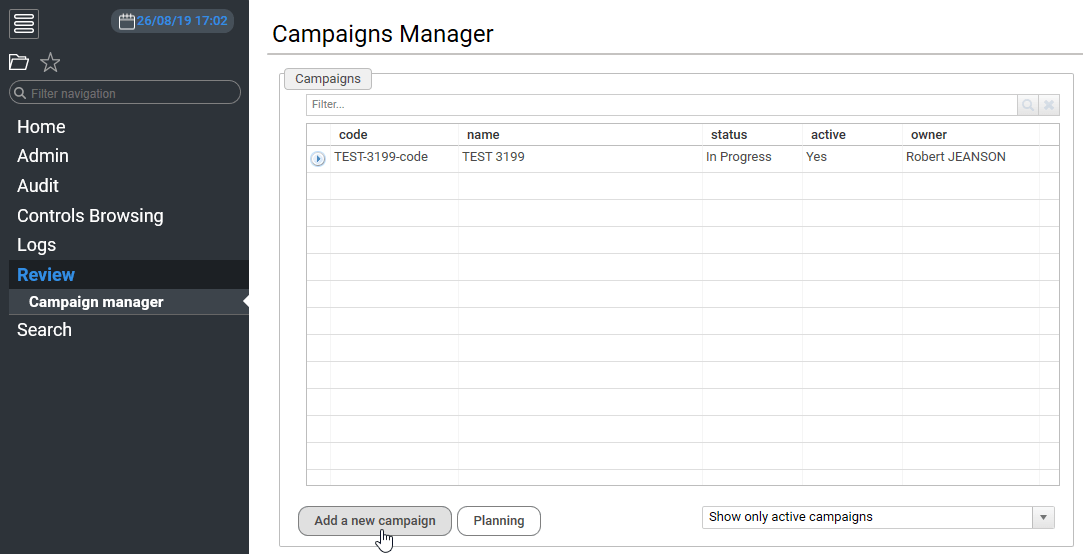
In the main campaign manager screen, press the button Add a new campaign to define a campaign based on the review definition that has been published.
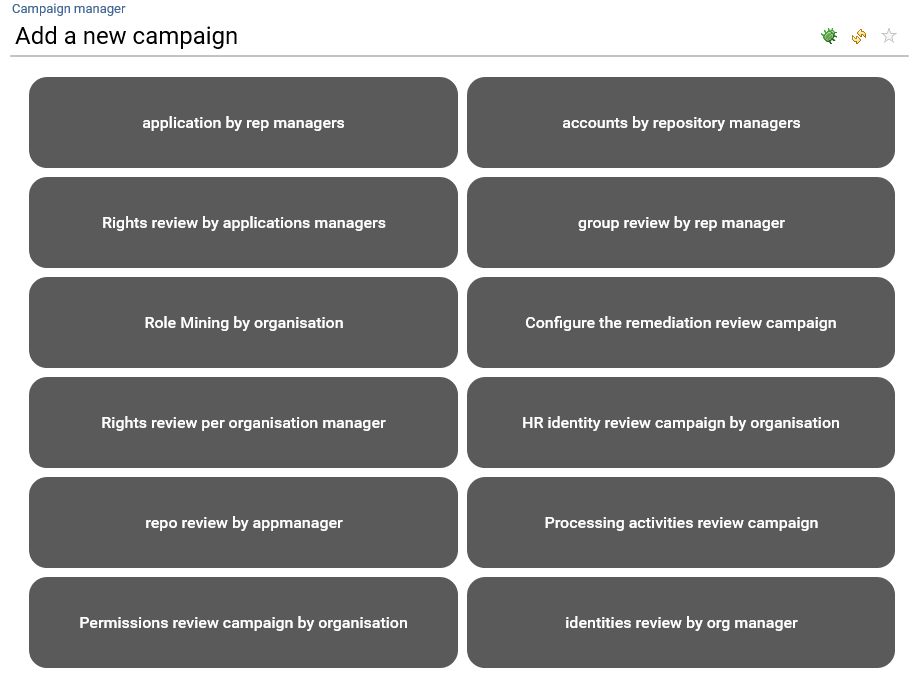
Then select the title of your campaign from the list of review definitions.
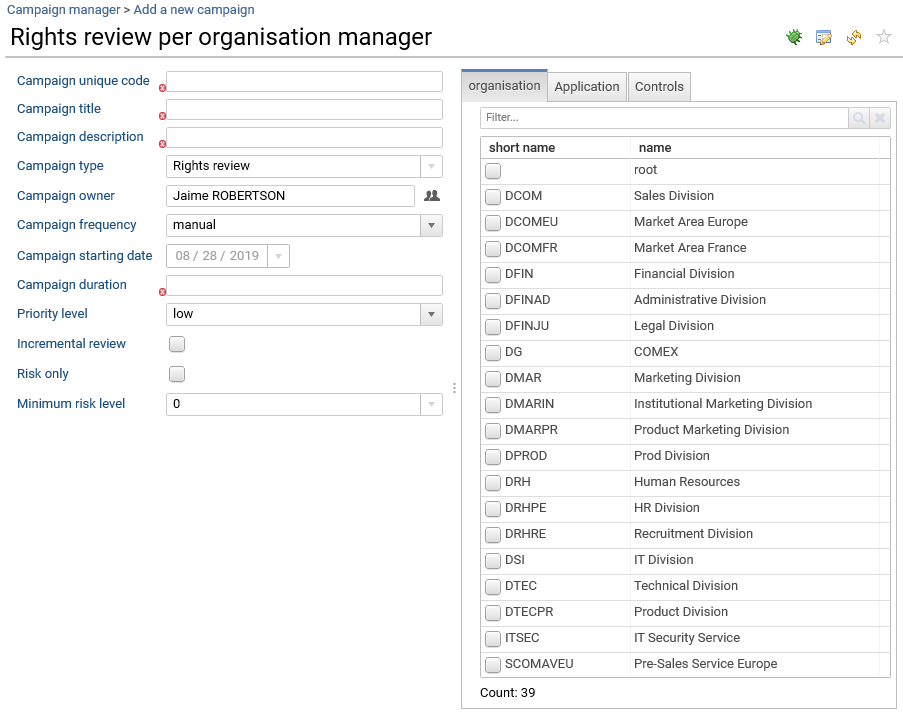
And fill the parameters (title, start date, frequency, owner...)
Now you are ready to start your campaign.