Overview
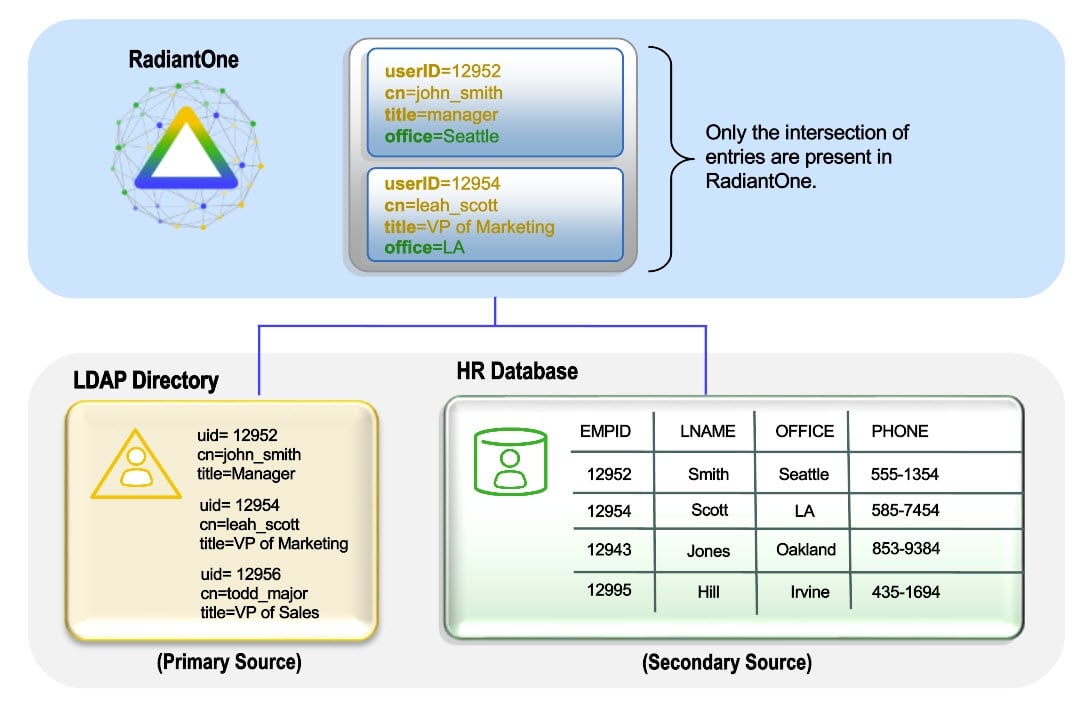
Objects from any sources in the RadiantOne namespace can be joined if they have an attribue value in common. With joins, you can extend the primary entries with attributes coming from another data source, or new application-specific attributes (required by applications, but don’t exist yet).
This page describes the following.
- Configuring a Global Join
- Configuring a Regular Join
- Configuring an Extended Join
- Bind Order
- Attribute Priority
Configuring a Global Join
To configure a global join:
-
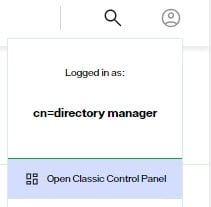
Global joins are configured from Classic Control Panel. To switch to Classic Control Panel, use the menu options for the logged in user in the upper right.
-
From the Classic Control Panel, go to the Settings tab > Interception section > Global External Joins.
-
Click Add. The Join Wizard opens.
-
Select Regular and click Next.
-
Select an Object Class associated with the entries from the primary object that you want to join.
-
Select the attribute you want to base the join condition on from the Join Attribute drop-down menu. Click Next.
-
Select the data source that represents the location that contains the secondary objects you want to join with. This can be either RadiantOne or another LDAP server that has been defined as a data source. If using RadiantOne as the secondary join source, select vds as the data source. If you want to join to some other LDAP, you must first configure the data source and then it appears in the drop-down list to select during this step.
-
Click Browse to locate the Base DN or enter the location yourself.
-
Specify the scope of search to perform to find the entries to join with. The drop-down options are base, one, or sub.
-
Select the specific object class associated with the secondary entries you want to join with in the Object Class parameter from the drop-down list. For information on schema extension, please see: Extending RadiantOne LDAP Schema
-
Select the attribute from the secondary object that you want to base the join condition on from the Join Attribute drop-down menu. The value of this attribute should match the value of the primary source join attribute that you set in step above. The Join Condition parameter displays the attribute matching criteria for the join.
-
Click Next.
-
Decide if you would like all the possible attributes returned from the secondary object or if you would like to list the attributes to return. If you choose to list the attributes, click Add and enter the name of the attribute (or select from the drop-down list). You also can provide a virtual/mapped name (this is optional and is the name of the attribute that appears in the virtual entry). Click OK and repeat this process for each attribute you would like returned from the secondary object. Click Next.
-
Enter a unique name for this join profile and click Finish.
-
Click Save.
Configuring a Regular Join
Regular joins are configured from the Control Panel > Setup > Directory Namespace > Namespace Design. Select the location where the identity view is mounted below Root Naming Contexts and go to the OBJECT BUILDER tab on the right. The primary source for regular joins is an object in an identity view. If the identity view is created using an LDAP proxy approach, you must select the primary object class on the OBJECT BUILDER tab to start. If the primary object is based on a container or content type of node in the identity view, then the object is already known and will automatically appear on the canvas on the OBJECT BUILDER tab.
To configure a regular join:
-
From the Control Panel > Setup > Directory Namespace > Namespace design, select the location of the node where you want to configure the join.
-
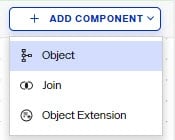
On the OBJECT BUILDER tab on the right, select the Object option from the +ADD COMPONENT drop-down menu. If your main view is an LDAP proxy, you must click ADD PRIMARY OBJECT first before adding the secondary object(s).
-
To join with an object in an existing identity view mounted in the RadiantOne namespace, choose the RadiantOne Namespace option. To join with an object from a data source schema that does not have an identity view created from it, choose the Secondary Data Source Schema option.
-
Click NEXT.
-
If you selected to join with an object in an existing identity view mounted in the RadiantOne namespace, manually enter the target base DN where the secondary entries are located, or click
 to select a location in the RadiantOne namespace. Select the object class associated with the secondary entries. Select a scope to locate the secondary entries below the target base dn. Select a Size Limit, this should typically be one (one entry in the primary source matches one entry in the secondary source). Click SELECT to add the object to the canvas.
 -
If you selected to join with an object from a data source schema, select the data source that contains the secondary object from the drop-down list. Select the schema associated with the data source that contains the object definition (click the Extract Schema link if you don't have a schema). Click NEXT. Select the object(s) in the schema and click SELECT to add the object to the canvas.
-
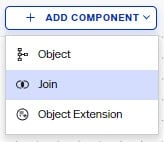
After all secondary objects are on the canvas, select the Join option from the +ADD COMPONENT drop-down menu.
-
Select the secondary object from the drop-down list.
NoteThe object associated with the primary view cannot be changed. Even if you have defined an object class mapping, you see the base object class, not the remapped one.
-
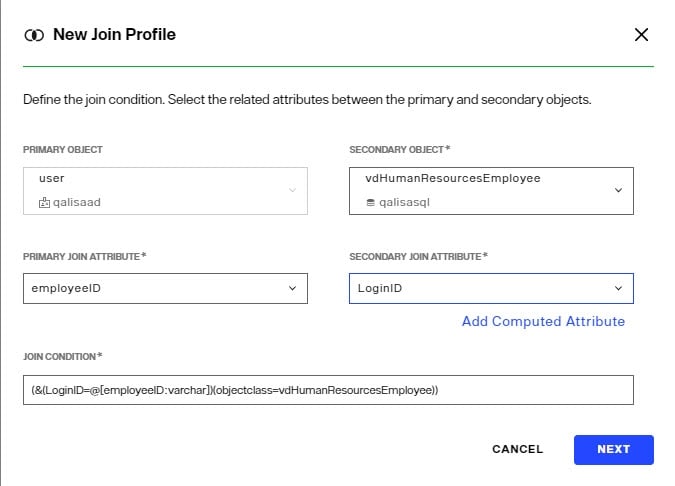
Select the attribute from the primary object to base the join on from the Primary Join Attribute drop-down list.
-
Select the attribute from the secondary objedct to base the join on from the Secondary Join Attribute drop-down list.
-
The join condition displays and can be manually edited if needed. Click NEXT.
-
Choose to either Return all Attributes from the secondary object, or choose the Return Attributes Listed below option and use the +ATTRIBUTE button to adjust the list of attributes accordingly.
-
Click NEXT.
-
Enter a unique join ID and click DONE.
-
Repeat these steps to add all join conditions. All secondary objects appear on the canvas. An example containing two secondary objects is shown below.

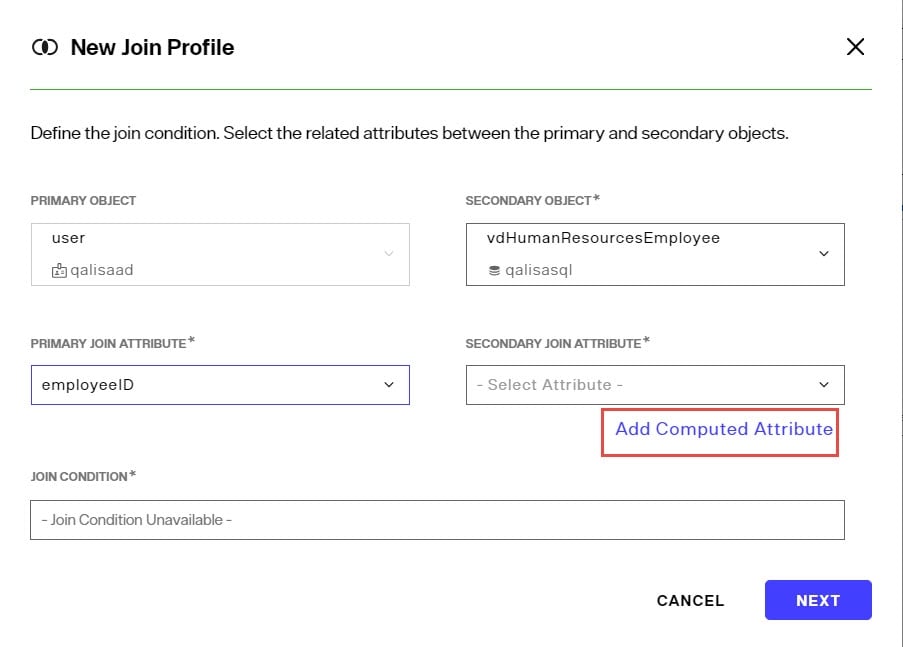
Configuring Join Condition Based on Computed Attribute
If you would like to create an attribute based on existing attributes of the primary object to base your join condition on, click Add Computed Attributes. This allows you to build a new attribute based on the attributes available in the primary object. This new attribute can then be used to base your join condition on. This computed attribute name is prefixed with “vsysa” and is used only to condition the join. It is not returned as part of the RadiantOne entry even if a client were to specifically request it.
Editing Join Profiles
If you need to edit a join profile, click the
![]() on the canvas that connects to the secondary object. This opens the join configuration panel on the right.
on the canvas that connects to the secondary object. This opens the join configuration panel on the right.

When editing the join, you can modify the secondary object, the attributes retrieved from the secondary object, computed attributes used in the join, and more advanced settings related to the primary object and join type. Joins can also be deactivated and/or deleted from the join configuration panel.
Secondary Object
When editing a join profile, expand the Secondary Object section to locate the following:
Data Source - this is a read-only value that indicates the data source name the secondary object is from.
Object Class - this is a read-only value that indicates the object class associated with the secondary object.
Target Base DN - this is the location in the RadiantOne namespace where the entries associated with the secondary object are located. When adding objects on the canvas, there are two options for where the objects come from: The RadiantOne Namespace or from a Secondary Data Source Schema. When the RadiantOne Namespace option is chosen, the user enters the target base DN. When the Secondary Data Source Schema option is chosen, an indentity view is automatically generated for the selected object(s) and mounted in the cn=staging default naming context. This location is the target base dn.
Scope - this is the scope of search needed to locate the secondary entries below the Target Base DN.
Join Condition - this is the attribute matching condition that dictates how the primary entries are linked to the secondary entries.
Attributes
When editing a join profile, expand the Attributes section to locate the list the attributes to manage the attributes returned from the secondary object. Click MANAGE ATTRIBUTES to add or remove attributes to return and/or remap the attribute name.
Computed Attributes for Joins
When editing a join profile, expand the Computed Attributes for Joins section to manage the computed attribute that is used in the join condition. Computed attributes defined for joins are shared across all join profiles configured on the canvas.
Advanced
Filter – By default, the only filter criteria on primary entries to condition a join is the object class (e.g. objectclass=inetOrgPerson). You can add more criteria to condition the primary entries to join using the Filter setting. For example, if you only want to join entries that have a location of San Francisco, you could add (l=San Francisco) in the Filter setting.
Size Limit - This is the number of entries to return in the search for the secondary entries. For example, setting this value to 1 would dictate that only one entry matching the join criteria should be returned from the query to the secondary object (target base DN).
Join Type - The join type is Left by default. With this join type, all entries from the primary source are returned. If the primary entry has a matching entry in a secondary source, those additional attributes comprise the RadiantOne entry. If Inner is chosen, it indicates that only primary entries that have a matching entry in a secondary source should be returned in the result. Primary entries that do not have a matching entry are not returned.
Attribute Properties
In a join configuration, attributes from each source can have certain characteristics assigned to them. These properties dictate attribute priority, visibility, searchability and updateability. Attribute properties are defined on the final object. From the OBJECT BUILDER tab, click the pencil icon on the final object output on the canvas.

The attribute properties described in this section are only applicable for dynamic, non-cached virtual views as they dictate how RadiantOne builds the joined view on-the-fly. Once a virtual view is in persistent cache, these characteristics are irrelevant.
Hidden
You can define an attribute as hidden because you need it for the join (it may be the attribute you are basing your join on), but you don’t want the value to be in the final joined entry.
To define an attribute as hidden, locate the attribute in the final object output window and toggle the Hidden option on.
Searchable
You can define attributes as searchable or not from the final object output window. Locate the attribute in the list and expand it to find the SEARCHABLE property.

-
If an attribute from a secondary source is defined as searchable, and a client uses the attribute in a search filter, RadiantOne must attempt the join on all entries from the primary source and then apply the filter to see which ones match the client search filter. If attributes from secondary sources must be searchable, RadiantOne must go through every entry in the primary source and attempt to join it with a secondary object. After, the client search filter is applied to the result.
-
If an attribute from a secondary source is defined as non-searchable, RadiantOne can apply the search filter on the primary entries (to narrow down the possible join candidates) and then only join those entries. The performance is better in this case because the join only needs to occur on a subset of the primary entries.
Updateable
You can define attributes as updateable or not from the final object output window. Locate the attribute in the list and expand it to find the UPDATEABLE property.

-
If an attribute is updateable, clients may modify the value (remember just because they can doesn’t mean access controls will allow it).
-
If an attribute is not updateable, clients cannot modify the value, regardless of access controls.
Attribute Priority
The priority level is only needed when the attribute name returned from the secondary source is the same (or has been mapped to the same) as in the primary source. The default behavior of RadiantOne is to return a multi-valued attribute if a secondary object returns an attribute with the same name as the primary object (as long as the values are different). If you do not want the attribute to return as a multi-value, you can set a priority for the attributes. The default priority level set for all attributes is normal. From the interface, you would use the priority levels shown below.
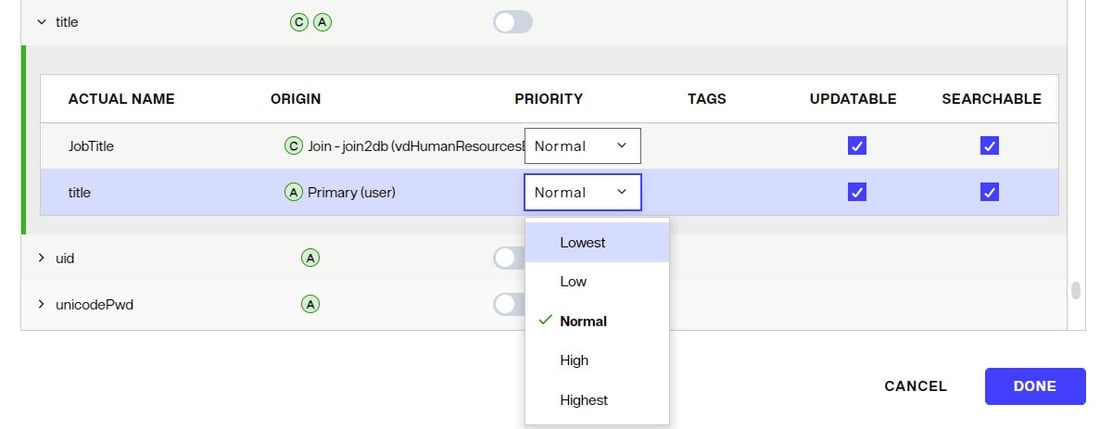
Priority Level:
- Lowest
- Low
- Normal
- High
- Highest
Only one priority level is assigned per attribute per source. Whereas a combination of searchable and updateable can be assigned per attribute per source.
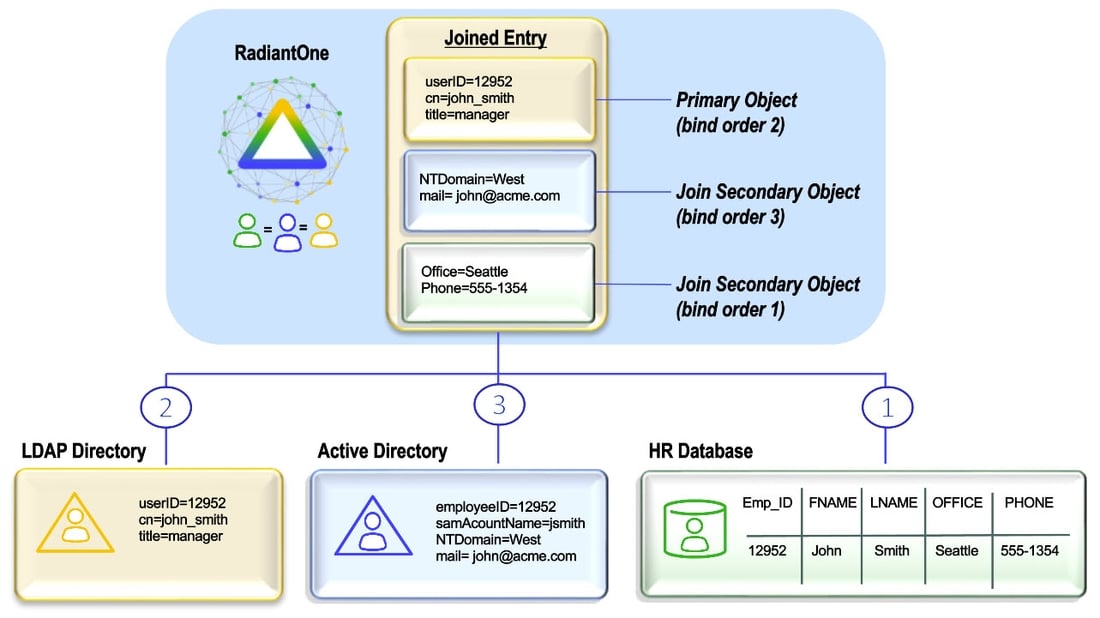
Bind Order
If you have configured joins between multiple sources, RadiantOne can send the bind request (credential checking) to many backends (any that play a role in the join). If you are not using joins, then bind order is irrelevant.
After the join is configured, you can set the bind order (the backends to check in a particular order). The diagram below depicts an example. The database is configured with bind order 1. Therefore, RadiantOne attempts the bind there first. If the bind fails against the database, the LDAP directory receives the bind request (as per the configuration). If the bind were to fail again, Active Directory would receive the bind request. If all sources fail, the client receives a bind failure error from RadiantOne.
If you have configured joins between the selected LDAP object and other sources, RadiantOne can send the bind request (credential checking) to many backends in a pre-defined order.
To configure the bind order:
- From the Control Panel > Setup > Directory Namespace > Namespace Design, select the node where you have configured a join below Root Naming Contexts.
- On the OBJECT BUILDER tab on the right, click on the Final Object Output on the canvas. The Final Object Output drawer displays.
- Expand the BIND ORDER section. A list of all sources displays in the table (the primary along with any secondary sources you have joined with).
- Enable the source as a possible participant in the bind operation.
- Use the
 to determine the order RadiantOne should attempt the credential checking. RadiantOne attempts to verify the credentials against the first enabled source in the list. If it fails, then the next is tried and so forth. If all enabled sources have been tried without success, RadiantOne returns a bind failed error to the client.
How the Join is Performed
If the “Limit Attributes Requested from the LDAP Backend” optimization is enabled for a proxy to an LDAP backend, in addition to a join, the attribute(s) from the primary LDAP source that the join(s) are based on should be listed as “always requested” on the Attributes Tab. Otherwise, RadiantOne may not get the attribute(s) from the primary backend that are required to perform the join and the join cannot be done. For more information on limiting attributes requested from the backend, please see: Tuning
Pre-filtering on the Primary Source
If the filter in the client search involves attribute(s) that come from the primary (main) source only, RadiantOne pre-filters (applying that filter to the primary entries to reduce the number of entries that are required to join). If the filter in the client search involves attributes that can come from secondary (joined) sources and those attributes(s) are marked as searchable, then RadiantOne cannot pre-filter on those attributes and must join everything first and then apply the filter on the joined result. RadiantOne knows if attributes used in the filter could come from secondary sources if the attribute(s) are specifically requested in the join condition, or if * is used in the join condition to return everything from the joined source.
If you require the attributes from the secondary sources to be Searchable (used in a filter from a client search), you must specify them as such. If the filter received in the search contains any attributes that are defined as searchable from a secondary source, then RadiantOne does not pre-filter against the primary source for those attributes. The join is first performed (all entries are joined), and then the filter is applied on the result. For example, let’s say you have a backend pointing to a Sun Directory and you want to join with a virtual view of Active Directory. The following join condition could be defined:
LDAP://[VDS]/dv=activedirectory,o=vds?sAMAccountName,objectclass,cn:1152?one?(employeeID=@[employeeNumber:VARCHAR(255)])
Since cn is requested in the join condition (as searchable, NOT updateable, and NORMAL priority, dictated by the numeric value), RadiantOne knows that it should apply the filter received from the client after first joining the entries. The Sun entries are joined with the Active Directory entries (where employeeNumber=employeeID) and then the filter requested by the client is applied on the result. Obviously, performance is slower if you want attributes from joined sources to be searchable (because of the requirement to first join all entries).
However, if a filter also contains an attribute that is only defined in the primary source (and not listed in any join condition), RadiantOne applies the filter on the primary entries to reduce the number that needs to be joined. Then, the reduced number of entries are joined and the client filter is applied on the joined result.
For example, using the join condition defined above, if RadiantOne receives a filter like: (&(mail=[email protected])(cn=laura callahan)), it first searches the Sun Java Directory for entries matching mail=[email protected] (because mail is not defined as an attribute to return from Active Directory). Then it joins the entries that were returned with the corresponding entries in Active Directory. Finally, RadiantOne applies the original filter on the joined entries and the ones that match are returned to the client. The result sent back to the client depends on whether your join configuration is set for a Left or Inner join. Each is described below.
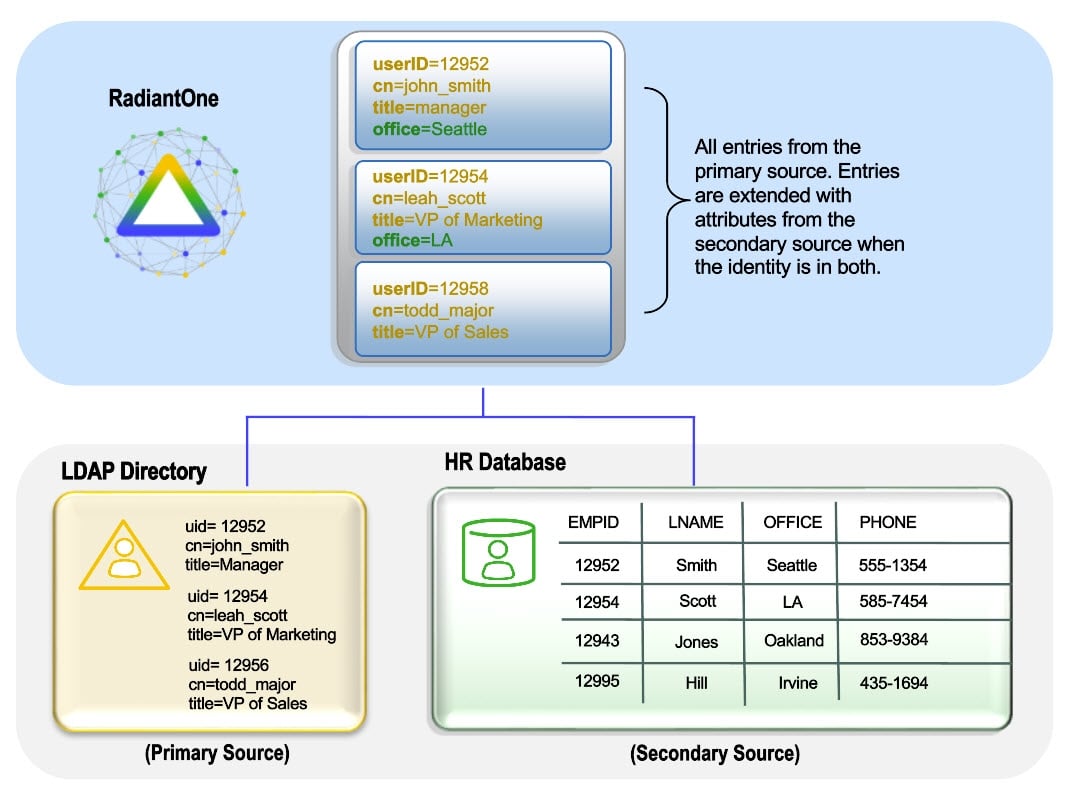
Left Join
In a Left Join, all entries from the primary source are returned in the result and if they have a matching entry in a secondary source(s), those additional attributes comprise the main entry. If an entry in the primary source does not have a matching entry in a secondary source it is still a possible candidate to be returned to the client (if it matches the original filter in the client request).
Inner Join
In an Inner Join, the primary entries (from the starting point for the join) are joined with matching secondary entries. Only entries that can be joined (the intersection) are possible candidates to be returned to the client (if it matches the original filter in the client request). The entry(s) that are returned will be comprised of attributes from the primary object and any secondary objects that were joined.
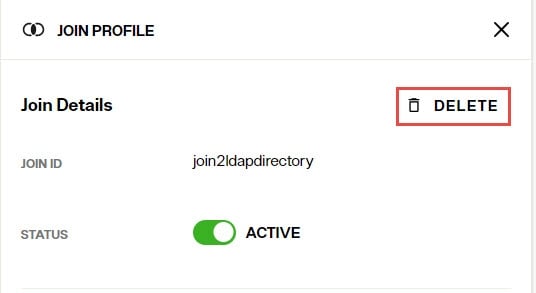
Deleting a Regular Join
To delete a join, edit a join profile by clicking the
![]() on the canvas that connects to the secondary object. This opens the join configuration panel on the right. Click the Delete button.
on the canvas that connects to the secondary object. This opens the join configuration panel on the right. Click the Delete button.
Deactivating a Regular Join
To deactivate a join, edit a join profile by clicking the
![]() on the canvas that connects to the secondary object. This opens the join configuration panel on the right. Toggle the Active option to Offline.
on the canvas that connects to the secondary object. This opens the join configuration panel on the right. Toggle the Active option to Offline.
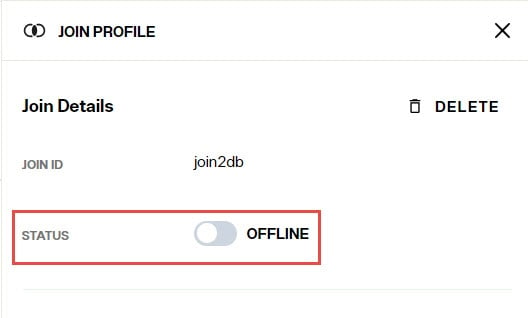
To activate the join, toggle the option to Active.
Configuring an Extended Join
An extended join is defined by adding new attributes (meaning these attributes don’t exist anywhere yet) to a primary entry. This is primarily used to accommodate the storage of application-specific attributes. In the case of an extended join, the RadiantOne service handles the creation and management of the new attributes. The new attributes are stored in the RadiantOne directory. The RadiantOne service joins the primary/main entries with these extended attributes as well as handles any modifications to these attributes accordingly (update, delete…etc.).
The diagram below depicts an extended join. AuthzCode, lastLogon, and pwdreset are the application-specific extension attributes that are stored in RadiantOne. RadiantOne manages the lifecycle (creation, modification, deletion) of these entries/attributes.

Extended joins are configured from the Control Panel > Setup > Directory Namespace > Namespace Design. Select the location where the identity view is mounted below Root Naming Contexts and go to the OBJECT BUILDER tab on the right. The primary source for extended joins is an object in an identity view. If the identity view is created using an LDAP proxy approach, you must select the primary object class on the OBJECT BUILDER tab to start. If the primary object is based on a container or content type of nodes in the identity view, then the object is already known and will automatically appear on the canvas on the OBJECT BUILDER tab.
To configure an extended join:
-
From the Control Panel > Setup > Directory Namespace > Namespace design, select the location of the node where you want to configure the join.
-
On the OBJECT BUILDER tab on the right, select the Object Extension option from the +ADD COMPONENT drop-down menu. If your main view is an LDAP proxy, you must click ADD PRIMARY OBJECT first before adding the secondary object(s).

-
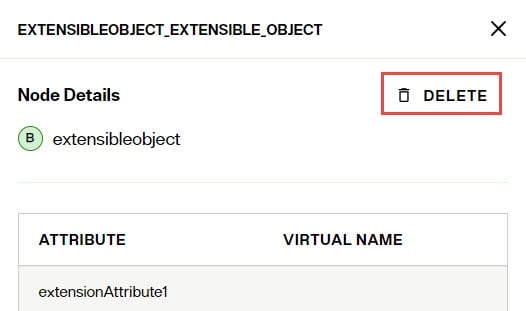
The default object class to associate with the extension attributes is extensibleObject. You can select a different object class from teh drop down list.
-
Click +ATTRIBUTE.
-
Enter the extension attribute name and click

-
Repeat steps 4-5 to add all extension attributes.
-
Click DONE.
-
Click SAVE to save the canvas.
Deleting an Extended Join
To delete an extended join, click the extension object on the canvas. This opens the join configuration panel on the right. Click the Delete button.
Deleting an extended join does not remove the entries in the extension storage. If you want the extension entries removed, you must do it manually.