Overview
RadiantOne REST (ADAP) API supports OAuth 2.0 / OpenID Connect (OIDC) token-based authentication. With this model, clients authenticate with an external authorization server (such as Okta) and use the resulting access token to authenticate API requests to RadiantOne.
This approach improves security by ensuring that user credentials are never sent to RadiantOne or the application. A single access token can be reused for multiple requests until it expires.
A high-level diagram of the different components is shown below. Postman is used as a simple client to illustrate the flow.
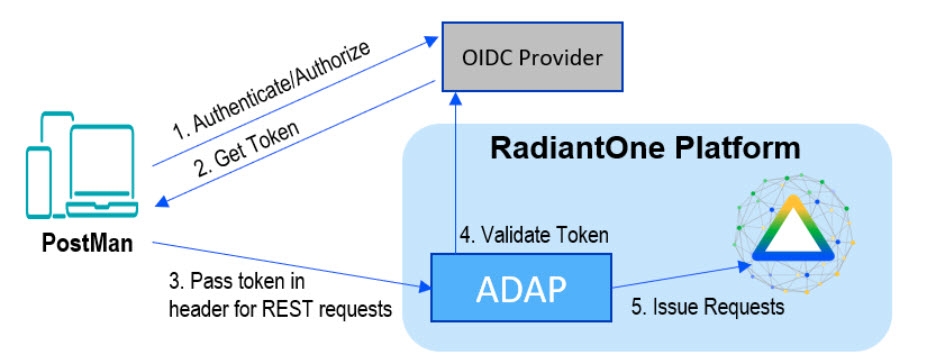
In this architecture, you need to follow these high-level steps:
-
Configure an external OIDC authorization server(such as Okta) to issue access tokens.
-
Configure RadiantOne to trust that authorization server using a Token Validator. This document covers additional details about setting up the Token Validator in the later sections.
-
Obtain the access token directly from the authorization server.
-
Call the RadiantOne REST (ADAP) API, presenting the token.
-
RadiantOne validates the token at request time and maps it to a directory identity.
Prerequisites
Before you begin configuring the token validator, ensure you have the following:
-
Configured an OIDC authorization server
-
Client ID and Client Secret
-
OIDC Discovery URL
-
Expected audience and required scopes
RadiantOne Configuration
This section describes configuring proxy authorization, configuring an ADAP external token validator, and Claims to FID User Mapping.
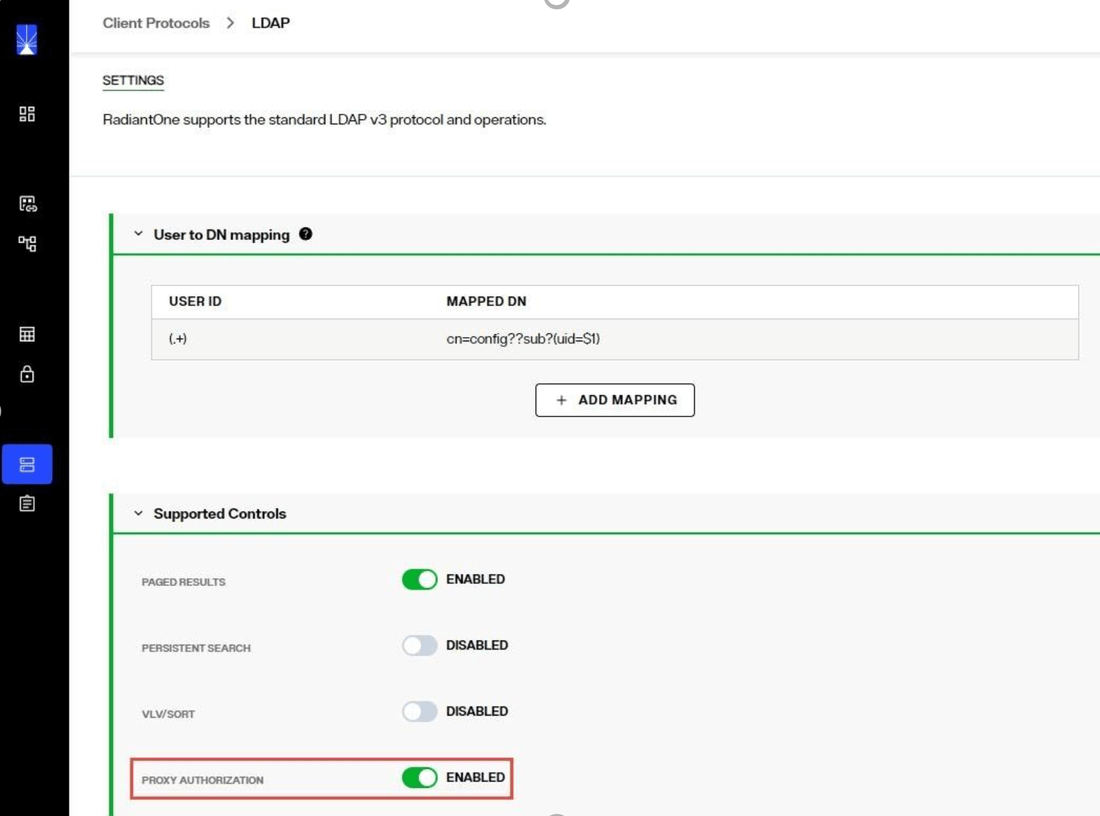
Configure Proxy Authorization
The RadiantOne REST (ADAP) service queries the RadiantOne LDAP service using proxy authorization.
To configure proxy authorization:
-
Navigate to Control Panel > Global Settings > Client Protocols > LDAP.
-
Enable Proxy Authorization and click SAVE.
-
Navigate to Control Panel > Security > Access Controls > General.
-
Enable the “ALLOW DIRECTORY MANAGER TO IMPERSONATE OTHER USERS” option and click SAVE.

Token Validators
With Token Validators, administrators can configure and manage trusted external token sources to ensure that only valid, verified tokens are accepted for API authentication.
Adding a Token Validator
-
Navigate to Global Settings > Token Validators
-
Click "Add Token Validator". This opens the configuration form.
-
Fill in the Required Fields
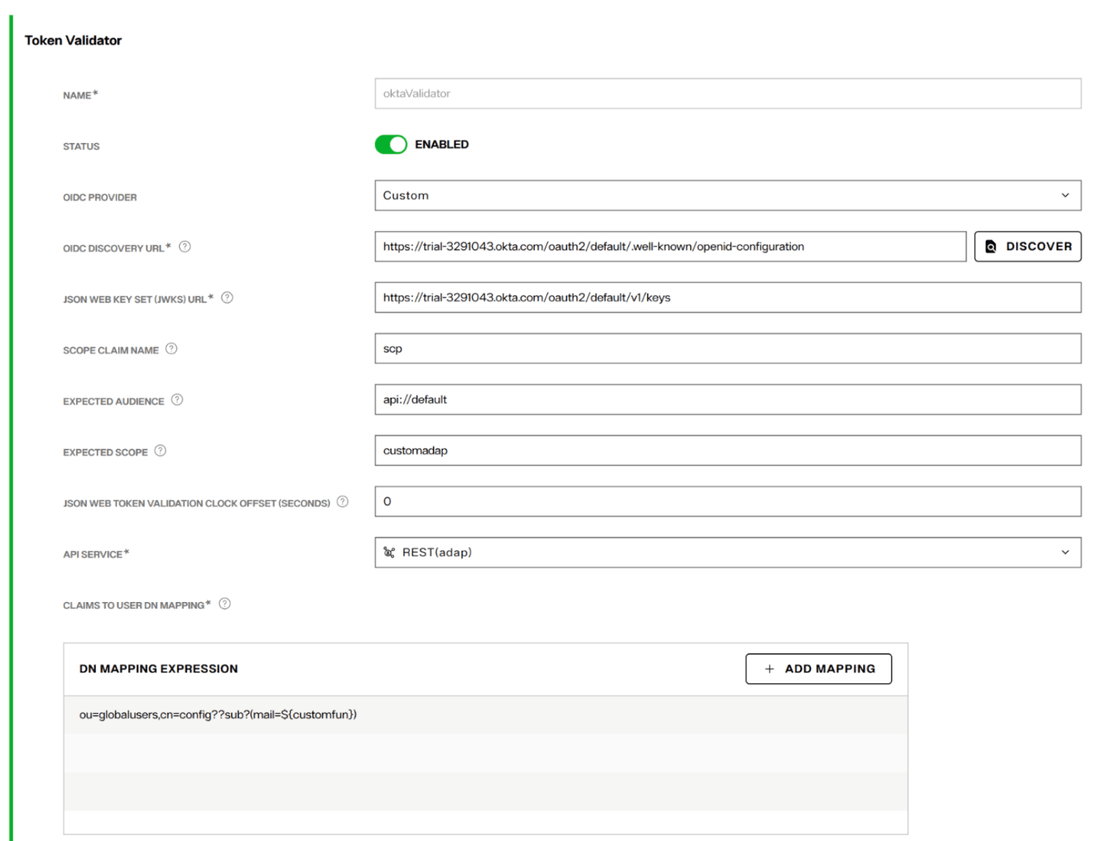
a. Name: A unique name for your validator.
b. OIDC Discovery URL: The OpenID Connect Discovery endpoint for your authorization server (e.g., Okta).
c. JSON Web Key Set (JWKS) URL: The endpoint where the public keys for token validation are published. Use the Discover button to auto-populate this field from the OIDC Discovery URL.
d. Scope Claim Name: The claim in the JWT that contains the scopes (default:scope).
e. Expected Audience: The audience value your tokens must contain.
f. Expected Scope: The required scope(s) for access.
g. JSON Web Token Validation Clock Offset (seconds): Adjusts for clock skew between systems.
h. Claims to User DN Mapping: This is the expression to map JWT claims to user distinguished names in Identity Data Management.
It defines how Identity Data Management converts information in a JWT (such as email or username claims) into the
Distinguished Name (DN) of a user in its directory. It’s essentially a template that uses JWT claims to locate or identify
the correct user account in Identity Data Management. -
By default, new validators are ENABLED. Leave it as enabled if you are using the validator. You can toggle the status to DISABLED if needed.
-
Click Save to create the validator.
Querying RadiantOne REST API (ADAP)
-
Request an access token from your OIDC provider.
Here’s an example request where Okta is the OIDC.
curl --request POST \ --url "https://trial-3291043.okta.com/oauth2/default/v1/token" \ --header "Accept: application/json" \ --header "Content-Type: application/x-www-form-urlencoded" \ --data "grant_type=client_credentials&client_id=<your client id>&client_secret=<your client secret> &scope=customadap" -
Use the access token as a bearer token. In this example, Postman is used to include the access token in the Authorization header as a bearer token.
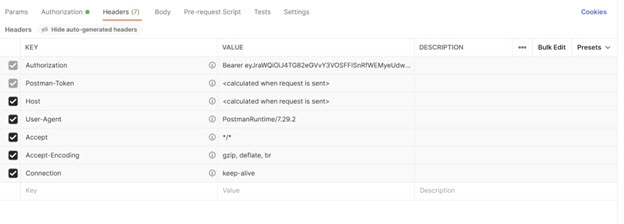
-
Make the API request. In this example, a basic search is performed.
FieldValueURL Syntax
http://
:8089/adap/ Method
Get
Header Name
Authorization
Header Value
Bearer
Example URL
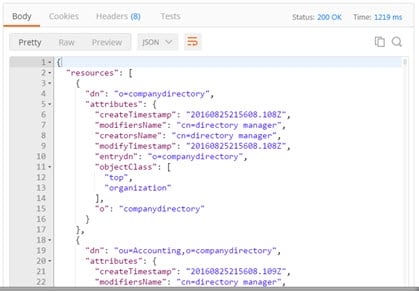
If successful, the operation displays a response body similar to the following.
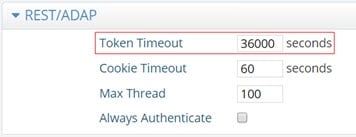
Token Lifetime
By default the token lifetime is set to 10 hours. To configure the token timeout:
-
Go to Classic Control Panel > Settings tab > Server Front End > Other Protocols section.
-
In the REST/ADAP section (requires Expert Mode), edit the value in the Token Timeout field.
-
Click Save.
-
Restart the RadiantOne service from the Environment Operations Center. In Environment Operations Center, navigate to Environments > <Environment_Name> > Overview tab and restart the Identity Data Management service from here. This performs a rolling restart and all nodes are restarted.
When an expired or unrecognized token is used, the Response section displays the message “Authentication failed: Unknown token”.

