Overview
This guide describes the following topics.
Secure Data Connectors are only leveraged in Identity Data management.
For more information on configuring data upload in Identity Data Analytics please refer to:
Managing Groups
This section describes how to add, edit, and delete SDC groups.
Adding Groups
To add an SDC group:
-
In the navigation pane on the left, select Secure Data Connectors.
-
In the upper-right corner, click New Group.
-
Enter a group name.
-
From the drop-down menu, select an environment.
-
Click
 .
.
The new group is displayed.
Editing Groups
-
In the navigation pane on the left, select Secure Data Connectors.
-
Click "..." next to the group you want to edit.
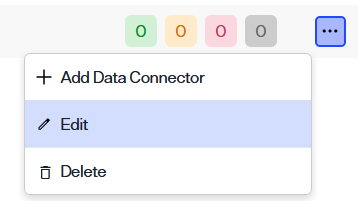 .
. -
Edit the group name and/or change the group's environment.
-
Click
.
Deleting Groups
-
In the navigation pane on the left, select Secure Data Connectors.
-
Click "..." next to the group you want to edit.
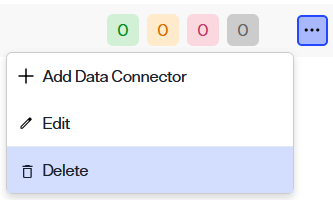 .
.
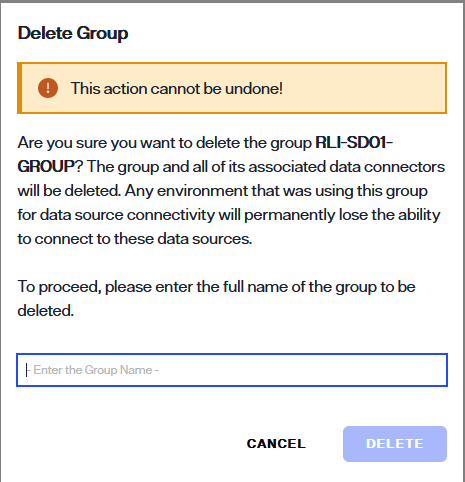
- In the Delete Group dialog box, enter the name of the group and click Delete.
 .
.
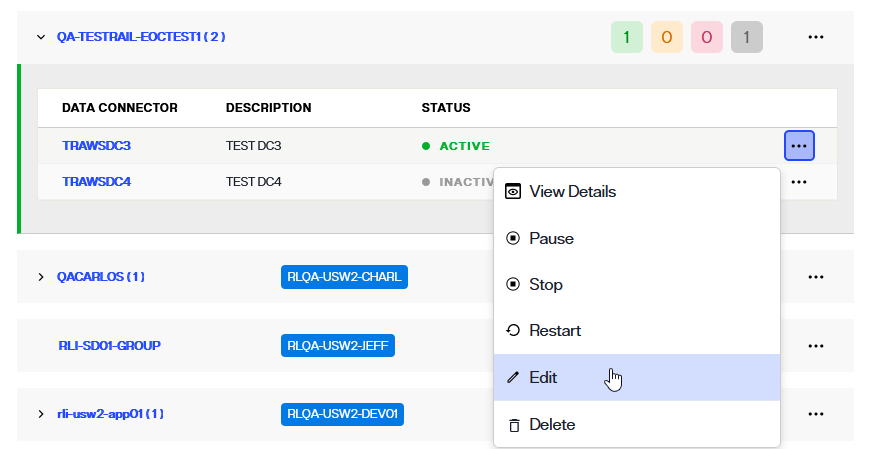
Managing Secure Data Connectors
Secure data connectors can be managed from the Secure Data Connectors screen. From here, you can edit, enable or disable, and delete connectors. This guide outlines the steps to manage data connectors.
Getting started
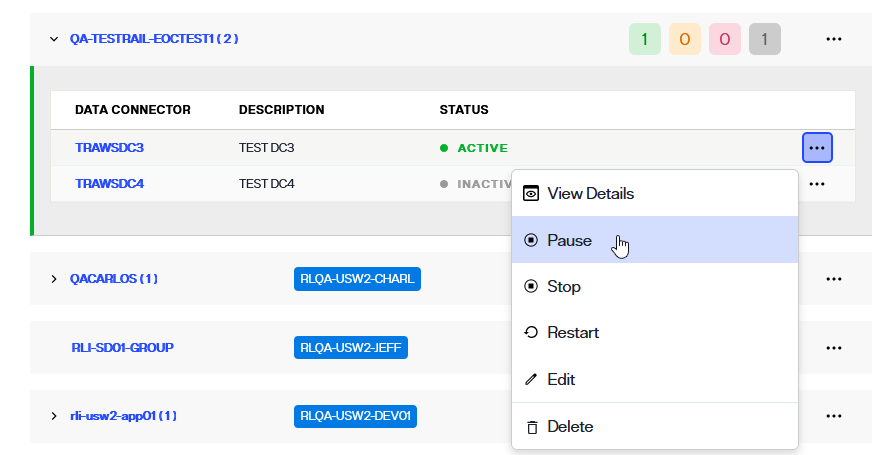
All of the operations to manage secure data connectors are available in the Options (...) dropdown for each connector. To begin managing a connector, select the Options (...) menu of the specific connector you wish to modify.
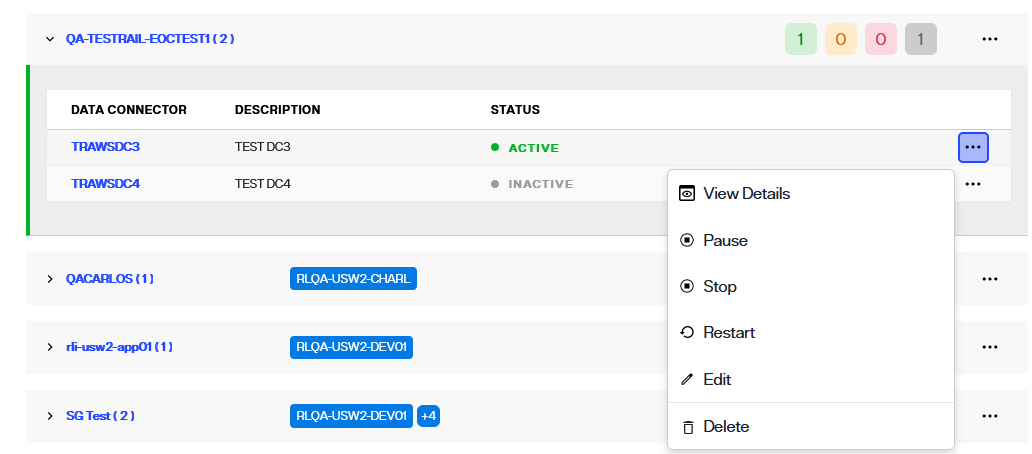
Edit a data connector
The name and description of a data connector can be updated. To edit connector details, select Edit from the associated Options (...) dropdown.
This enables the Data Connector row editable. In the provided name and description fields, update the connector details as needed. Select ✅ to update the connector details.
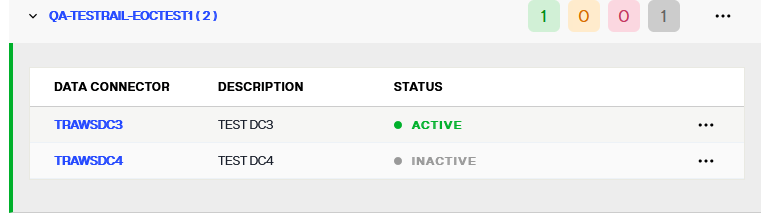
The connectors list will display updated details for the updated Secure Data Connector.
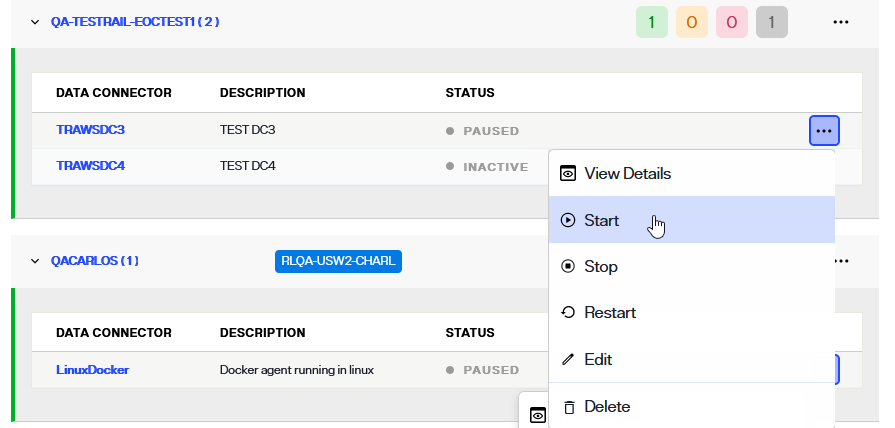
Enable or disable a connector
To disable a data connector, select Pause from the Options (...) dropdown.
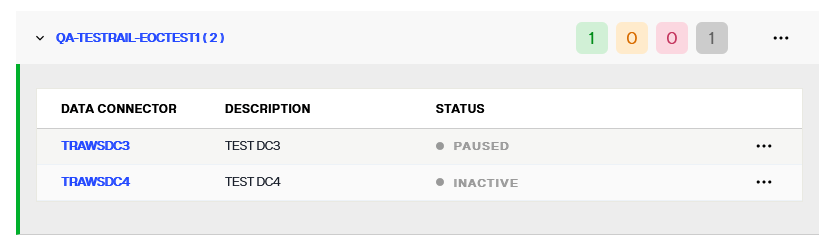
The connector status will update to "Paused" and all associated connections will be disabled.
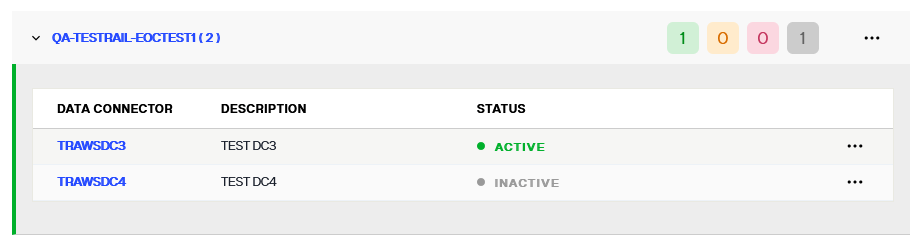
To reactivate a data connector, select Start from the Options (...) dropdown.
The connector status will update to "Active" and all associated connections will be enabled.
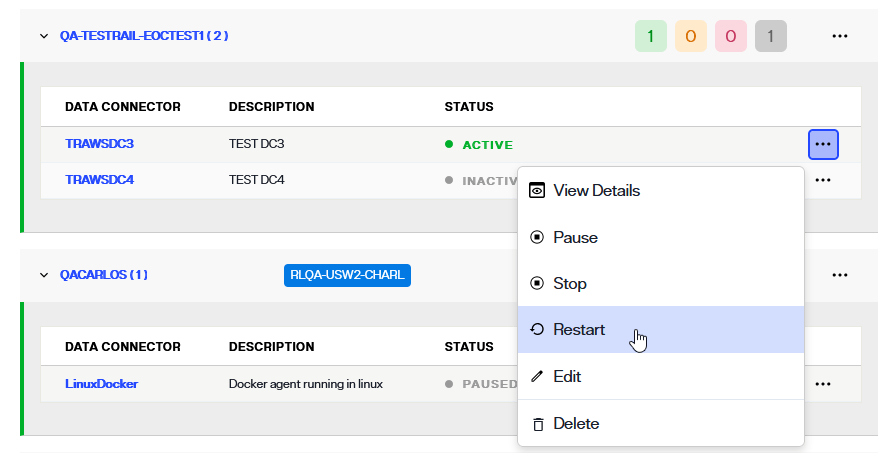
Restart a data connector
To restart a data connector, select Restart from the Options (...) dropdown.
The connector will completely stop and get started. This action is similar to starting a data connector for the first time, which does pulling all latest configurations, stops, and starts all the required processes.
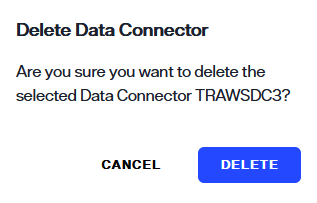
Delete a data connector
To delete a data connector, select Delete from the Options (...) dropdown.
[!warning] Deleting a data connector is a permanent action and cannot be undone.
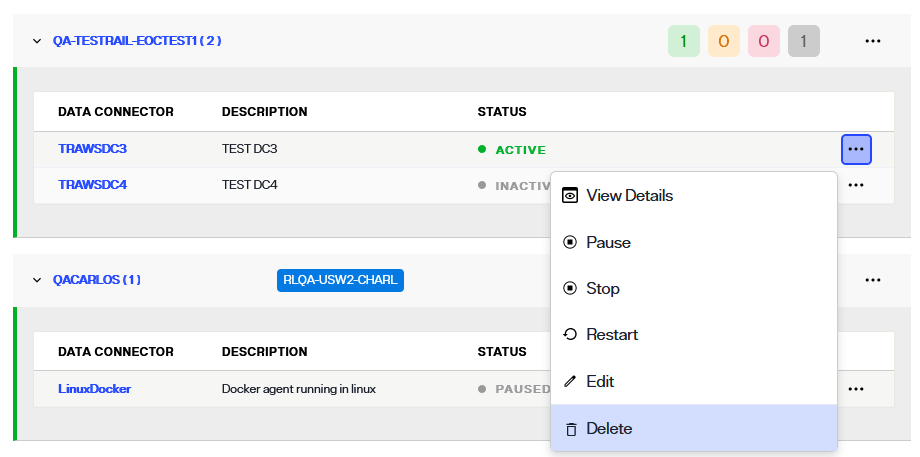
A confirmation dialog will appear asking you to confirm that you would like to delete the selected data connector. Select Delete to proceed and delete the connector.
If you would like to keep the connector, select Cancel to exit out of the workflow to delete the connector.
If the connector is successfully deleted, you will receive a confirmation message on the Secure Data Connectors home screen and the connector will no longer be available in the lits of connectors.